I'm so excited to be jetting off to CHA in sunny California in the morning! (Not excited about the 6:30 AM flight departure!) Six of us from The Little Blue House are going to scout out all the new products to place orders for the newest and freshest designs out there. We will be blogging from there on The Little Blue House blog so check out the blog daily. I am not taking my laptop this time so will update everyone when I return next week.
This week we have featured organizing large embellishments on the LBH blog (link above) so take a look at our ideas for getting it together in that department. Or, if you've missed the past two weeks, check out the organizing ideas for ribbons and small embellishments in past posts.
Au revoir!
Thursday, January 27, 2011
Saturday, January 22, 2011
Another Journal Page
I've been really busy designing projects and teaching classes but am trying to keep up with the art journaling challenge of playing at least ten minutes a day in my journal. These are the results of the past week.
On this page I decided to just cut squares and rectangles of lots of coordinated scraps from other projects. I glued them randomly (yet in a grid) to the page with gel medium.
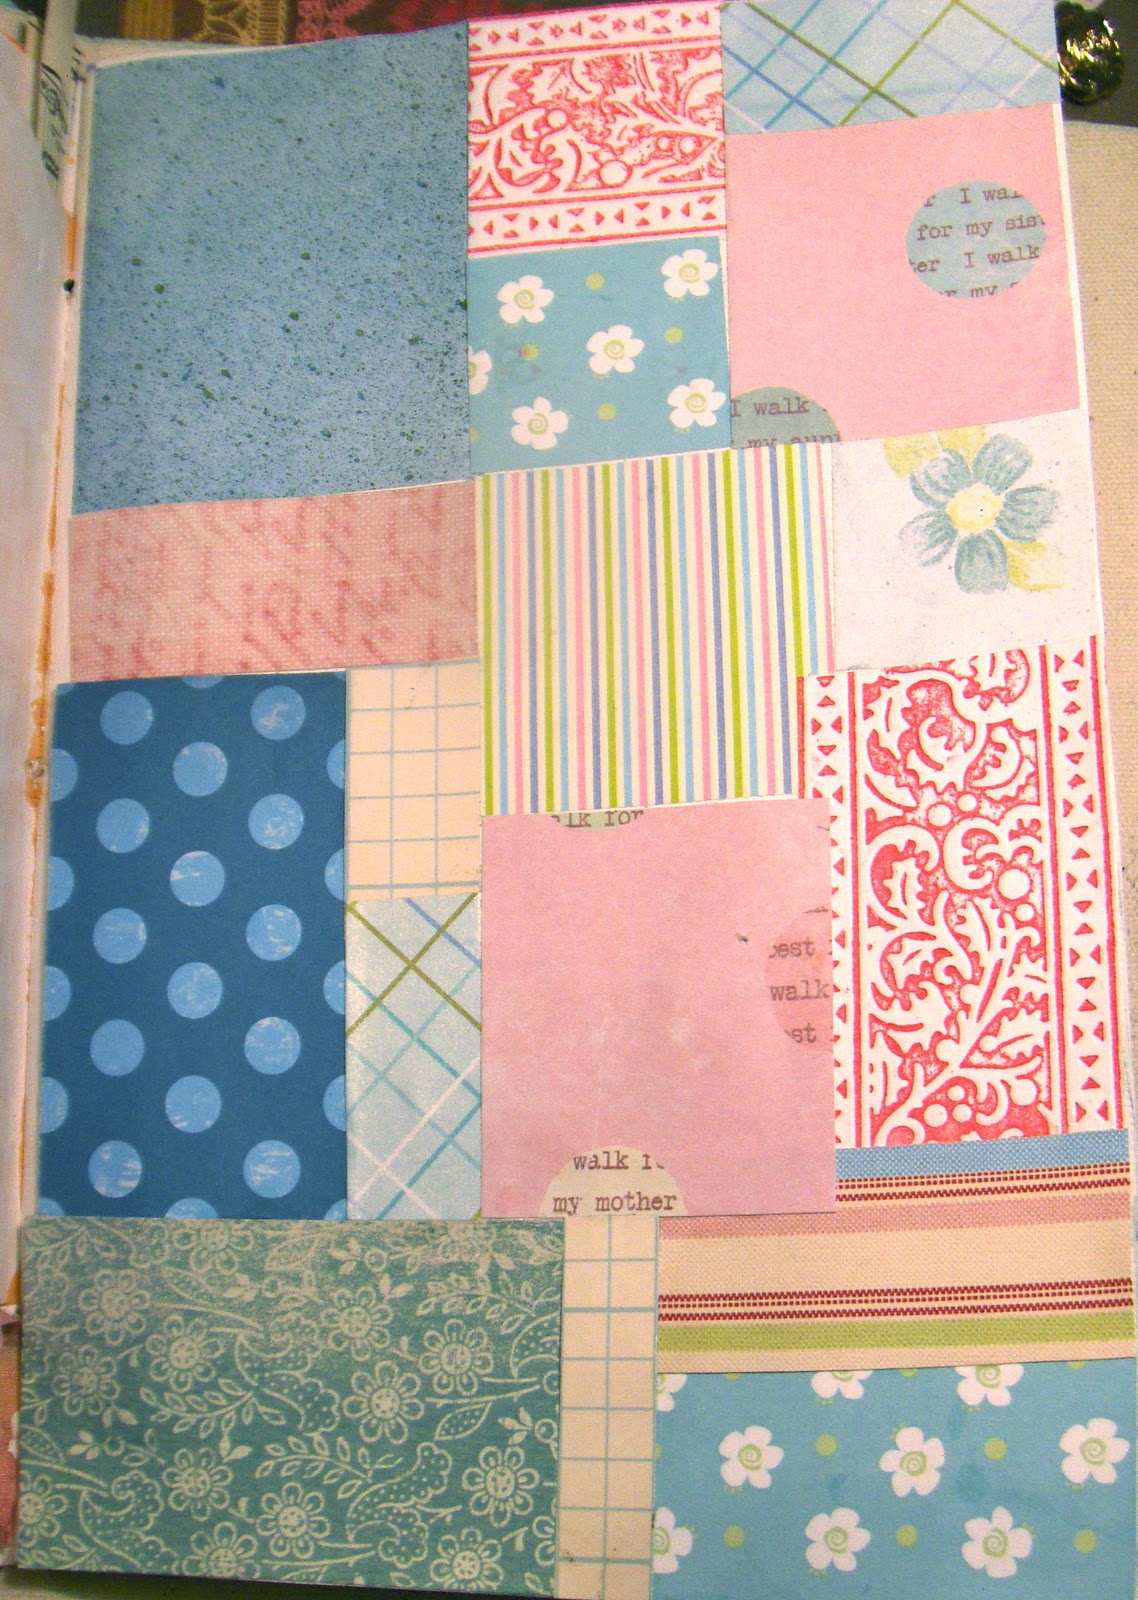
To unify the patterns and colors, I added a thin wash of gesso - one of my favorite ways to tone down colors or unify a page.

I wasn't sure what to do next, but my husband attended a photography convention last weekend and brought alot of giveaway literature home. He especially thought I'd like this darling photo of a baby - and I did! I looked at it a few days on my desk and then thought it would be a great addition to the colors and feel of this page. I tore it and glued it to the bottom of the page and then cut up and adhered a quote I had saved.

The page still needed more, so I used my new Pilot Permaball pen to outline each section and to draw scallops around the perimeter. Done! I'm liking it...

Friday, January 21, 2011
Fiber Storage
Last week The Little Blue House focused on ribbon storage. Since I had already organized all my ribbons, I decided to focus on my fibers which were out of hand. Remember this mess?

This is what it looks like now. I used the same box which is actually a paper mache trunk I received in a swap years ago. It's slightly larger than the photo boxes I store my ribbon in. I cut chipboard pieces 4" x 7" and wrapped the fibers around, staying in color families. For the fibers I had a lot of, I wound several yards on the card and then placed the extras in a ziploc baggie. This can be put away until I need more! It's so satisfying to look into the box and see such order - and it's pretty too!

Several years ago I had bought this little ring bound "book" with small plastic baggies for fiber and thread storage. (I can't remember what it was called or who made it.) You can see that I've really outgrown it! In fact, I had to replace the rings with these much larger ones. I think now that the "book"covers are superfluous and I'll just remove them. Since these were all organized, I didn't redo them but they can hang near my fiber box so all will be together. It's a great system, especially if you only have a small amount of fibers.

Wednesday, January 19, 2011
New Classes
Here's a peek at some of the new classes I've designed and am teaching at The Little Blue House.
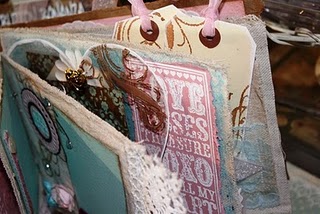
First up is a shabby, vintage altered canvas mini book. The covers are corrugated cardboard and five pages are canvas, handsewn by me. (There is absolutely no sewing in the class itself, which will make many customers happy!) The book also includes an acrylic and a chipboard page, lots of lace and flowers and stamping. This is so versatile - can be used for a Valentine/sweetheart book, a wedding book, friends' book, baby book or even a Mother's Day tribute.


Another card class, using PK Glitz fabulous glitter and their printed acetate. Students will learn how to use these products and even receive a free set of micro tips for the glitter glue.


This class is the next in our seasonal block series. Last fall we started this with the base and blocks and the first tag set was for Halloween. Since then we have taught tags for Autumn, Thanksgiving, Christmas, Winter and now Valentines Day. I designed this set. I love the addition of Ten Seconds Studio art metal for the key and the keyhole and the two-color glitter heart really sparkles.


The perpetual calendar was a collaborative effort among Tracy,Elaine and I. I love the frame treatment and the hanging tags are made from chalkcloth. You can write on them with the new chalk markers and then change them up whenever you like!

Our focus in January has been on organization, so this class was created to help keep desks organized and clutter-free. We again utilized the chalkcloth (it's awesome!) for the labels and the Lazy Susan can be made to coordinate with each individual's workspace.

There are still more classes which you can see and read more about on the Little Blue House blog. If you are local, stop by anytime to see these great projects in person!
Tuesday, January 18, 2011
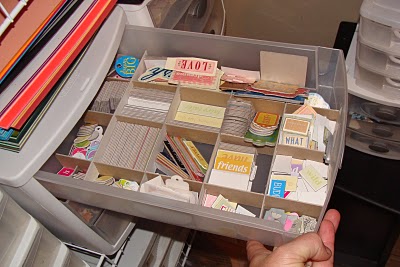
More on Small Embellishment Storage
I've done some more research looking for other small embellishment storage solutions. Here are a few things I found on the web.
Recycle, reuse, repurpose. This photo shows laundry detergent containers (from England) but because they are sturdy, clear and stackable, they make great storage containers for a variety of things! I know we have lots of similar plastic containers here in the US too.

Someone else had a similar idea.

How about clear shoe boxes? These look like ones The Container Store sells - hey I have some of these in my closet!

Baskets are useful for corraling lots of little items. They are also very decorative and can hide the contents somewhat if you don't like seeing everything on display.

How about this gorgeous antique wooden library cabinet? I LOVE this!!

This would be great for taking to crops or crafting at friends' houses. I believe I've seen this at Joann's and they often have 40% off storage pieces.

This is a simple solution. If you can't find dividers for drawers, you can make them with little boxes or cut chipboard to size.
Another possibility - spice containers. These are round magnetic metal ones. Hang on a piece of sheet metal or a magnetic board.

Another spice container version, this one stands on your desk or workspace.

And, finally, this is the Clip-It-Up, available commercially HERE. But it's expensive!

Try this homemade version. Check out Denise Hill's blog post for her "El Cheapo" clip-it-up version which costs under $2.00 to make using a 1/4" wooden dowel, 2 cup hooks and a bag of 2" badge ID tags. This could be used for many different storage solutions!

I hope these ideas give you some inspiration to get-it-together this week and organize your small embellishments!
Monday, January 17, 2011
Get it Together - Week 2 - Small Embellishments
Over at The Little Blue House we are on the second week of our organizational series. This week we are focusing on small embellishments. Here are a few ideas for storing all those little items - check out the LBH blog for the full posting!


This is my co-worker, Rhonda's system. She has a large divided clear box for button storage at home and a similar but smaller one for her "travel" tote. She also stores most of her embellishments by color in the stacked boxes on the right.

I, personally, struggle with this category. There are so many sizes of embellishments and I can't decide whether to store them by item or by color. I will be back later in the week to show some of my embellishment storage methods.
a tacklebox - good if you are an "on-the-go" crafter

these units stack and are good for beads, brads, eyelets and small stuff
"small parts" unit from hardware store
(these come in many sizes and are good if you have the wall space)
pretty and functional storage for buttons (or small ribbon pieces)
This is my co-worker, Rhonda's system. She has a large divided clear box for button storage at home and a similar but smaller one for her "travel" tote. She also stores most of her embellishments by color in the stacked boxes on the right.

I, personally, struggle with this category. There are so many sizes of embellishments and I can't decide whether to store them by item or by color. I will be back later in the week to show some of my embellishment storage methods.
Saturday, January 15, 2011
LBH Art Group
Yesterday was the first monthly meeting of our new Art Group at The Little Blue House. We had a three-hour daytime session and repeated it again in the evening. We had almost a full house and lots of fun! The art group is going to be a technique-based series, learning about and creating many altered projects and including swaps, challenges, round-robin projects and more. I am really excited about this and hope that this will provide an avenue to get many of us out of our comfort zones, trying new and different art forms. If you want to learn more, check out the link to The Little Blue House above and make plans to join us if you live nearby!
For the January meeting I altered tags using the 2010 Christmas Tags of Tim Holtz as my inspiration. I adapted his #6, 11 and 12 tags for Valentines and used a lighter, more feminine palette.
"Key to My Heart" uses an embossed resist technique with a handmade stamp made with an Alterations Edge Die and fun foam. What fun you can have with this technique - any of your dies could be made into stamps! I used black Ten Seconds Studio art metal and an Alterations key die as a substitute for an antique skeleton key and sewed lace on the bottom of the tag.


Monday, January 10, 2011
Get It Together - Week One - Ribbon Organization
(Note: Prepare yourself, this is a long post!)
Over at the Little Blue House (the local store where I design and teach) we have started an 8-week session to "Get it Together, Organize with Style." We will be posting each Monday on the blog about organizing different sections of our craft/art spaces. Check it out and become a follower to avoid missing any important ideas and tips that might just help you create order out of the chaos that we all have in our creative spaces. And we aren't just preaching here - all of us at the LBH have resolved to work right alongside all of you in our own spaces!
Over at the Little Blue House (the local store where I design and teach) we have started an 8-week session to "Get it Together, Organize with Style." We will be posting each Monday on the blog about organizing different sections of our craft/art spaces. Check it out and become a follower to avoid missing any important ideas and tips that might just help you create order out of the chaos that we all have in our creative spaces. And we aren't just preaching here - all of us at the LBH have resolved to work right alongside all of you in our own spaces!
This week we tackle ribbon. Does your ribbon pile resemble this? I think we all have something similar, especially if you just love ribbon!

It seems that I, personally, have tried just about every way to store ribbons. When I first started out, I used a divided plastic storage box (the kind often used for embroidery floss), but my collection soon outgrew that idea!
Here is another idea - hanging spools on a tiered pants hanger. This is great if you don't have too many and if the spools are all a similar size. It's also very portable. I tried this for awhile also, but once I got to 2 racks and still didn't have room for all my ribbons, I decided it was time to try something new.

This was one of my most favorite (and most inexpensive) forms of storage. This is a cardboard ribbon display rack usually found on the end caps of Michael's or Hobby Lobby with their seasonal ribbons. I happened upon one that was almost empty and took it to the register to see if I could have it. They were happy to get rid of it as it's usually just thrown away. I have used this for a long time and it's sturdy and holds alot of ribbons.

Last summer my ribbon collection had outgrown every storage solution, so I decided to try Tracy's solution (she is my co-worker and owner of the LBH - she posts about this storage system today on the LBH blog). I'm not sure why I didn't think of it sooner! It utilizes the photo/video storage boxes (like shoe boxes) that can be purchased inexpensively at craft stores. Once you have your box, you measure to determine the size for cardboard cards to fit inside. This is about 4"x7". Cut the cards from scrap chipboard, cardboard or even cereal boxes (recycle, recycle!) and wind your ribbons on each card by color family. A pearl-headed pin secures the loose end. Then file the cards by color! This photo shows one card completed. Depending on the width of the ribbons, you can fit five to seven ribbons on each card.


At present I have two full boxes with a third started. But I must admit I still am using a few other storage methods as well. Below you can see how I store my small ribbon pieces, ones that aren't worth wrapping around the cards. I like seeing them through the glass jars on my little shelf unit. This is also the first place I go to look for a piece of ribbon. If I don't find anything here, then I will cut into my larger pieces within the boxes.


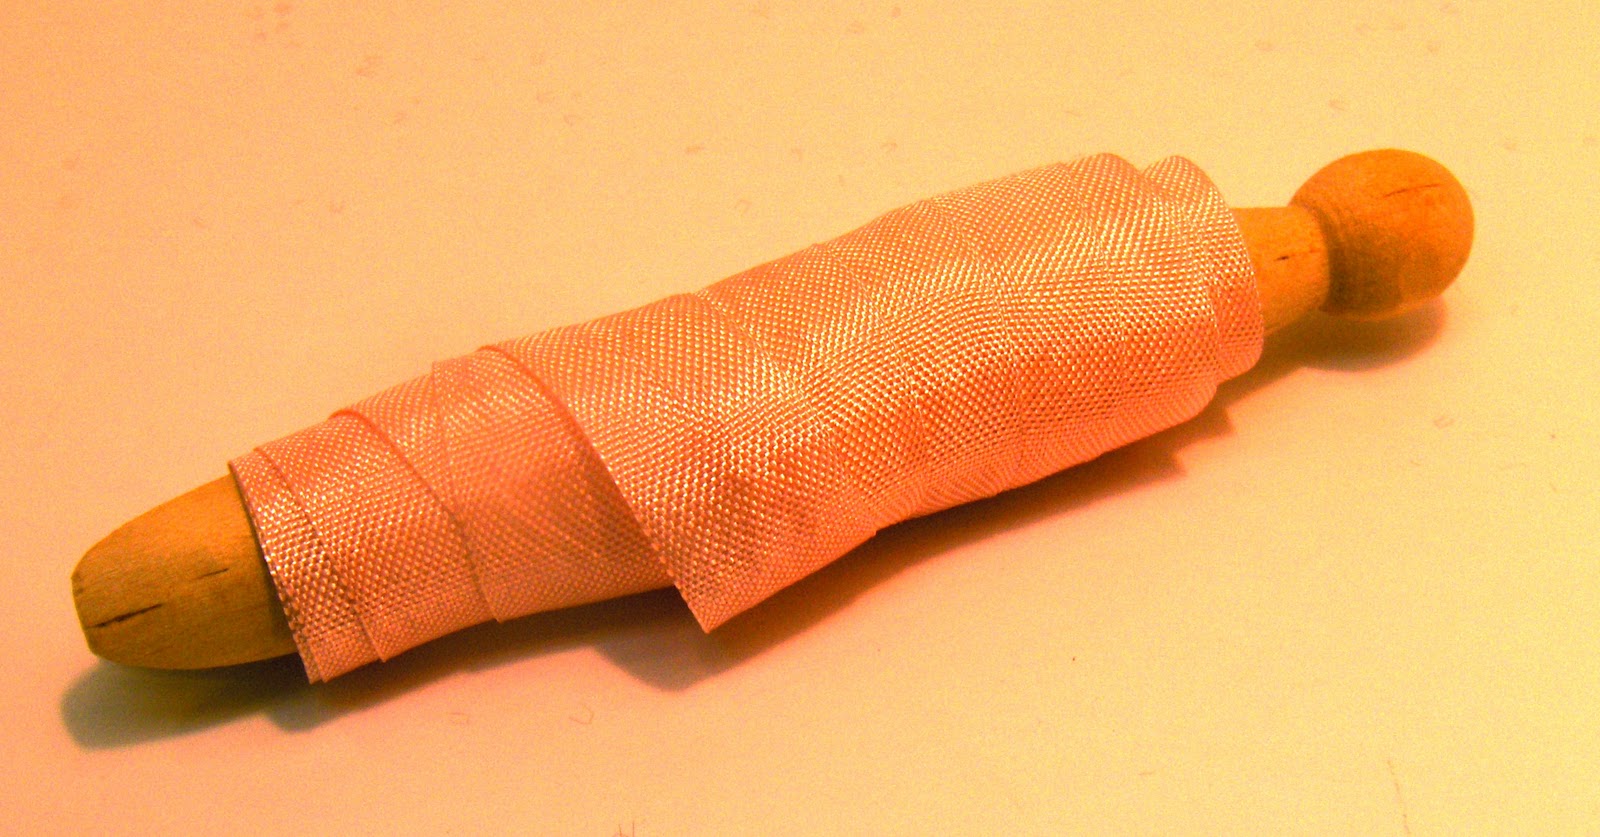
I also don't like to store my silk ribbons on the cards as they crease. I use old-fashioned round wooden clothespins (usually found in the doll or wood section of the craft store), wind the ribbon around and secure the end with a bit of regular tape. Since I don't have many of these, they fit nicely in an old insulated glass that fell apart.

Now that my ribbons are under control, maybe I should tackle my fibers! I think I will try these on the cards in boxes also as they are taking up way too much space and it's a disorganized mess!

I hope you find some inspiration in these ideas and photos and will join us in taking baby steps to getting organized!
Saturday, January 8, 2011
Working on Page 2
I've been playing on the second page of my art journal the past few days. First I gessoed the page and then spritzed Glimmer Mist over the page. I then removed the mask and added a Maya Road mist (which sputtered and splotched all over). I liked the combo of the colors though.

Not sure what to do next, I tore a heart from an old dictionary page and glued it to the page.

To integrate the heart with the background, I painted over it with a diluted pink acrylic paint and then stamped circles with several bottle tops in white and pink paints.

So now ideas are going to have to percolate for awhile on what to do next! The great part of art journaling is that you can keep coming back to the pages and change or add as desired, at least until you are either very happy with the results or nothing is improving the page!
Subscribe to:
Posts (Atom)