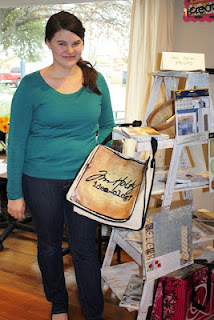
Yesterday I showed you the contents of the new Front Porch Kit, Nature's Charm, which included a burlap-covered canvas. His name is "Mr. Burl Ap" and he's 10" x 10" ( I mistakenly said he was 8x8 - those are the inside dimensions.)
Everyone on the design team had to create something with Mr. Burl Ap (yes, we name our surfaces) and it's interesting to see all the different and very unique creations. So many creative ideas! (Take a look for yourself on our new website and the FPK gallery:
www.thelittlebluehouseonline.com)
I turned my canvas so the recessed side (usually the back) is the front, much like a shadowbox. I used the gorgeous papers from Authentique in the background and added a sweet baby photo that I borrowed from a friend's gallery. Of course, once our little grandson arrives at the end of this month (!) I will be able to change it out with his photo. Instead of adding a cardstock mat around the photo, I swiped ivory paint around the edges to make it stand out.
The products I used were all from the kit.
I made the bird nest by folding and coiling the burlap ribbon into a circle, leaving a space in the center. The eggs were made from the cotton balls - I mixed white glue and liquid Distress Stain (from Ranger) together to make a light blue. I then soaked pieces of cotton in the mixture and rolled and rolled them into little egg shapes. This took a long time to dry. Once dry, though, I coated them lightly with a bit of iridescent Stickles. These are my favorite part of the entire project.
I diecut the bird (see below) from a scalloped blue tag included in the kit. I even used the narrow white satin ribbon from the tag, but colored it with blue Distress Stain and tied it around the kraft pocket. The bird's wing is one of the paisley shapes cut from a strip of paper. The branch is a piece of paper-covered wire embellished with leaves and floral sprigs.

I used a technique for the "wood" frame surrounding the canvas which I learned at the CHA Tim Holtz class I attended. First I cut the wool plank patterned paper into strips to fit all four sides and then sprayed each strip with Ranger Ink Refresher. (This is a product which has been around a long time but is normally used for refreshing your ink pads to keep them juicy a bit longer before re-inking. However, Tim came up with using it to dampen paper and create a unique textured surface that feels like suede or leather.) I massaged the Refresher into the papers until mostly absorbed and then crumpled them. After drying them with a heat tool, I flattened them with my fingers and swiped lightly with a brown ink pad. When I adhered the strips to the sides of the canvas, I overlapped them and left a bit of overhang to look like the old frames for samplers.
I hope you're enjoying seeing this kit and the projects. If you are interested in getting your own kit, please contact the
LBH by phone or you can now order online :
www.thelittlebluehouseonline.com
Come by tomorrow for more projects!


