"Art is my vehicle through life; may we share the ride together." Ron Wickersham

Monday, April 27, 2015

One More Echo Park Tutorial - Father's Day Card

I have one more tutorial for you using the Echo Park "Jack" paper collection. Before you know it it will be Father's Day so I have made a card for Dad using this super cute collection.


Supplies You Will Need:

4" tan twill trim *
Navy cardstock - 4 1/4" x 11" and a scrap approximately 2" x 3" *
"Brown  Sugar" cardstock 3 3/4" x 5" *
Tape runner or Scotch Quick Dry Tacky Glue *
dimensional foam adhesive *
Edge distressing tool 
Tim Holtz Tiny Attacher or stapler *

(all starred items available in LBH store)


Instructions:


1. Fold navy cardstock in half to create a top-fold card base.

2. Cut red "trucks" paper  4" x 5 1/4", ink edges and attach to front of card.

3. Cut out "map" journal card, distress and ink edges and attach over the red paper. Add globe sticker on dimensional foam adhesive over the globe printed on the journal card. (See photo above with sticker in place.)


4. Cut strip of TSS Deco Leather 1/2" x 5 1/4" and adhere vertically to left side of card front.

5. Add "Finest", "My Hero" and "Dad" stickers from Elements Sticker Sheet to card, popping up the "Dad" sticker.

6. Layer tan frame sticker (also from Elements sheet) to scrap of navy card stock and trim around leaving approximately 1/8" border. Add navy alpha stickers from Alpha Sticker Sheet.  Fold over tan twill and staple to top of frame. Trim ends of twill. Pop this up on card as shown.


7. For the inside, ink edges of tan card stock and adhere.

8. Add compass sticker (Elements Sticker Sheet) to lower left corner.


I have had lots of fun with the paper collection. I love the two 12 x 12 sticker sheets! Even though I've created four projects and used many of the stickers, there are still dozens left.  Making more masculine cards would be a great project to use some of these leftovers.

Friday, April 24, 2015

Documented Life Project - Week 16

Week 16 - April 19-25

April Theme: Color Safari (Exploring Inks and Paints)
Art Challenge: Monoprinting with Gelli Plate
Journal Prompt: A Lot on My Plate


 Here's my spread for the current week - finished before Saturday even!

I was so happy with the art challenge this week - I've had my gelli plate for over a year and have only played with it once or twice. This was a great excuse to get it out and plaY! The great thing is, you make the mess once and then you have oodles of prints to use in projects for a very long time.

I chose three different gelli prints from my play day to use on this spread: the main page is predominantly blue and green; the calendar side is a book page that was actually where I mopped up extra paint and cleaned off stencils (torn into strips for the 7 days of the week); and the orange scallops at the top of the page were cut from a predominantly yellow and orange print.

I liked the blue and green print a lot, so didn't add much to it. For the prompt (a lot on my plate) I decided to use the idea of keeping a balance with all the areas of our lives requiring attention. It's hard to see in the photo but I did a bit of messy journaling on the right side saying "when my plate is full I need to remember to keep a balance ... and breathe."

I used rubons for BALANCE and computer-generated the words below.

This was a quick and easy page (if you don't count the day spent gelli printing). I'm pretty happy with it even though it's not my usual color scheme. I love that about art journaling - you can challenge yourself and step out of your comfort zone. It doesn't have to be perfect and is all about the process!

Thursday, April 23, 2015

Documented Life Project - Week 15

Week 15 - April 12-18

April Theme: Color Safari (Exploring Inks and Paints)
Art Challenge: Acrylics
Journal Prompt: "Cry me a River"


This was my spread for last week using my new Dylusions paints. I love these! She formulated them especially for journal pages. They dry almost immediately (especially if you apply them with an old credit card like I did) and do not warp the pages. The colors are very saturated and mix beautifully into other pretty colors.

After scraping on pink, yellow and red paints, I added stamping with bubble wrap and white paint and black ink and one of the new Natural Elements stamps from Rae Missigman. I doodled with paint and a brush and my fingers and added marks with a bottle lid and turquoise paint. The finishing touches were added with paint pens.

I didn't want to use the journal prompt so did the opposite, creating a happy page. The "title" is: You can't skip and be unhappy at the same time", a Dyan Reaveley stamp.

This was a fun page - it's hard to know when to stop!

Wednesday, April 22, 2015

"Daddy and Me" Clipboard Canvas Tutorial

I have another tutorial today using more of the Echo Park "Jack" paper collection.  These papers are perfect for masculine projects - both for boys and Dads - so I created this cute "clipboard canvas" to showcase some photos of my oldest grandson, Carl, and his dad.


Supply List
(* = in LBH store, links provided for products in LBH online store)

10" x 10" artist canvas
acrylic paint (navy)
9 1/2" square denim fabric (I used a piece from discarded jeans)
9" square chipboard
scrap white card stock
Tim Holtz Clipboard Clip *
optional: two tiny screws
16" tan twill trim *
10" narrow red and white stripe ribbon *
3/4" x 6" torn strip of denim
liquid tacky glue *
dimensional foam dots *

Let's get started!
(Note - I designed this to be a changeable display piece. The layout is attached to chipboard for stability and can be removed from the clipboard clip in order to display other layouts.)

Instructions

1.  Paint the canvas with acrylic paint and let dry.

2. Cut a square of denim yardage (or use a piece cut from old jeans like I did!) and fray the edges. If desired, machine stitch around the perimeter.

3. Using thick tacky glue or fabric glue, adhere denim to canvas.

4. Center and glue clipboard clip to top of canvas. For added security, add two screws in the holes of the clip.

5. Cut 9" square of wood-patterned paper and glue to chipboard. Ink edges.

6.  Cut following papers and ink edges:
solid (dark blue side) - 2 1/4" x 8"
light blue pattern - 2 1/2" x 8"
red cars - 5 1/2" x 5"
diamond - 1" x 5 1/2"

Glue in place as shown in photo below.


7. Add 4 sticker borders (from Elements Sticker Sheet) as shown above. Note that the border along the top edge of the layout is actually the "throw-away" piece between the red plane and blue oval borders.

8. Mat largest photo on the dark blue solid paper (mine was approximately 4" x 6") and one smaller photo on the light blue solid paper (approximately 3" x 4").

9. Add another smaller photo to the back of the "Memories...Having Fun" 3x4 card. Score 1/4" from left edge of side with photo, add Scor Tape or glue to scored edge and adhere to layout. Knot each end of 5" piece of red and white ribbon and glue in place along edge. Add small "Adventure" sticker below photo. Cut blue and white frame from sticker sheet and attach to right side of journal card as a tab. Add red arrow sticker on top. Add large gray "Adventure" sticker on layout under the journal card.


10. Tie 12" tan twill around the bottom of larger photo and mat. Mat "Father and Son" sticker on scrap of white card stock and trim. Attach to tied knot with pin. Adhere this photo along with the smaller photo on the layout.

11. Add large blue camera and "When I Grow Up" stickers to layout with dimensional foam dots.

12. Add blue and white tab sticker and number stickers above the large photo.

13. Tie remaining pieces of ribbons and the denim strip to clip.

14. Clip finished layout to canvas and display!


I hope you enjoyed this tutorial! Please visit The Little Blue House to see this on display and get your supplies. You can also purchase many of the products on our website: www.thelittlebluehouseonline.com

Monday, April 20, 2015

Fun with the Gelli Plate Today

The Art Challenge for this week's Documented Life Project is using the Gelli Plate. Since I was off today and had nothing scheduled, I decided it was a great day to just play and get messy with my gelli plate.

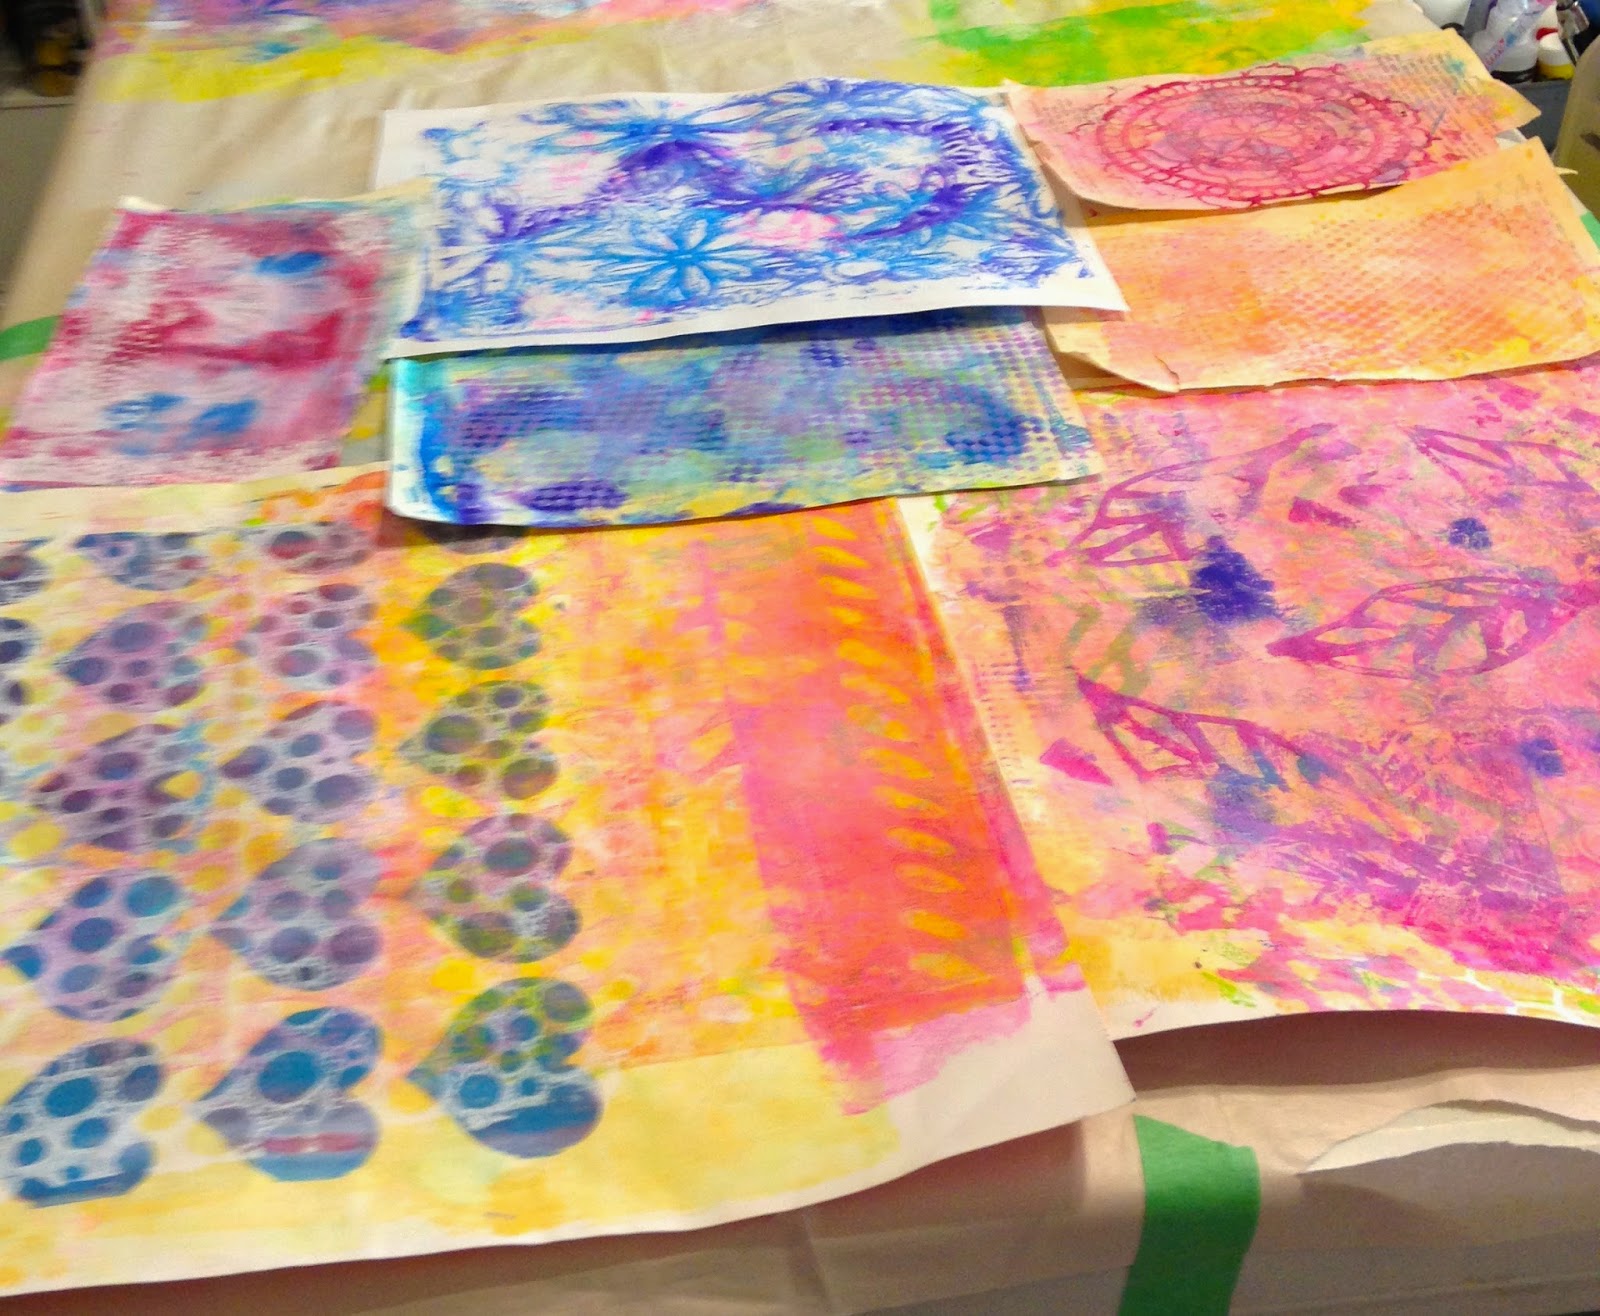
This is what I ended up with after a few hours' play. 47 backgrounds - some on book pages, some on 8.5" x 11" lightweight copy paper, some on deli paper and some on the backs of old lightweight scrapbook paper!


And this is the scrap paper I laid down to protect my table - even this looks great and I'm sure I will use it for something.


So when was the last time you just played? 

Friday, April 17, 2015

CLEARLY CREATIVE BLOG HOP - Friday and Saturday


 April 16 and 17

Welcome to our second LBH Media Team Blog Hop. This time we are featuring the Bella Blvd Clear Cuts which are available both in store and online. Each team member will be showing how she used them in a variety of projects. 

Here is the list of participating blogs and links in case you get lost along the way. And, you will have two days to visit all the blogs!


Be sure to visit each blog and leave a comment. Here's a peek at the fun prize for one lucky commenter!


So let's get started! The Clear Cuts are polka-dot transparency overlays in lots of colors and are fun to use.  They can be punched, die cut, cut on a die cutting machine, sewn, adhered over another pattern, made into flowers, painted and I'm sure there are many other options we haven't thought of yet!

I created two small projects - (1) a cute little pinwheel which would be great as a cupcake topper or even a package trim and (2) a small envelope perfect for a gift card or a note.


PINWHEEL INSTRUCTIONS

For the pinwheel you will need:
 (1) 3" square of Clear Cuts (I used the red polka dots - love it!)
1 coordinating brad
1 Queen & Co. decorative straw (*in store only)
 approximately 6" narrow ribbon

 1.  Cut from each corner of the 3" square toward the center but do not cut through the center. The easiest way to do this is to hold the center of the square with your thumb and index finger of your non-dominant hand and cut from each corner just to your fingers. In the photo below I have placed the Clear Cut on white paper and drawn the cut lines since it is hard to see this in a photograph. The little area in the center is what will be left uncut.


2.  Punch a small hole in the center and one corner of each "triangle" as shown below (black dots).


3. Place brad in one corner hole and then insert the brad into the next corner hole. Repeat adding all corners to the brad. When all four are stacked on brad, insert brad into the center hole. Open brad ends to secure. That's it!

4. Cut straw to desired length and glue completed pinwheel to the end OR you can punch a hole through both sides of the end of the straw, open the brad and insert the ends through the holes to secure without glue.

5. Knot a piece of coordinating ribbon around the base of the pinwheel. Insert in a cupcake or add to a package!


GIFT CARD ENVELOPE INSTRUCTIONS

For the clear envelope you will need:
 a 5" square of the Clear Cuts (or larger, depending on the size of envelope desired)
WeR Envelope Punch Board  (available at LBH store)

1. Place Clear Cut square on the envelope punch board (I have added white paper behind the clear square in these photos so you can see it better) with the left edge aligned on the number indicated in the printed directions on the board. For this, I used a 5" x 5" square to make a 2" x 3.5" envelope and aligned the edge at #2. Punch at top and score on the right with the scoring tool. Rotate the square counter-clockwise to align this score line with the little blue score guide and punch and score again. Repeat this until all four sides have been punched and scored.


This is what your square will look like after punching and scoring.


2. Fold along both short score lines and one long score line and glue overlapping edges. I used Glossy Accents and it barely shows. The top flap will remain open. You're done!


3. Insert a gift card or note and give to someone special!


I hope you are enjoying all the girls' projects. From here you will hop on over to Kristyn's blog to check out her project. And don't forget to comment! YOU could be the lucky winner!

Thursday, April 16, 2015

"One Awesome Boy" Layout Tutorial


One Awesome Boy Layout
Echo Park "Jack and Jill" Paper Collection

My layout and full tutorial are featured on The Little Blue House blog today. I used the Echo Park "Jack" paper collection which is darling for little (or big) boys! So many cute stickers and embellishments in the collection.  Be sure to check it out! 


Sunday, April 12, 2015

Bible Band Tutorial


I made this band for my bible a few days ago and posted it on Facebook and Instagram. I had a few requests on how I made it, so I thought I would share a brief tutorial here today.

First, here is a disclaimer: this is not my original idea. I saw it on Patter Cross's blog recently and got the instructions there.

So here is what you will need:

1"-wide non-roll elastic
medium-weight cotton fabric
sewing machine and thread to match fabric
handmade or purchased flower
fabric glue or needle and thread for hand sewing

1. You need to measure your bible. Wrap a tape measure around the height (if you want the band to wrap like mine) or width (if you want it to wrap around horizontally). 
2. Cut the elastic the same length with no overlap (mine was 20").
3. Cut fabric 4" wide and twice the length of the elastic. I purchased a "fat quarter" which is 18" x 18" square. I had to piece 18" lengths to get a 40" strip. If you have yardage, you will be able to cut one continuous strip (but you will also have lots of extra fabric).
4. Fold fabric in half lengthwise, right sides together, and sew together with a 5/8" seam.
5. Turn right side out and iron flat with seam in center.
6. Thread elastic through.
7. Join ends together and fit around bible to make sure it fits, adjusting if necessary.
8. Sew ends together. I used a zigzag stitch and went back and forth several times to reinforce it.
9. Add a flower over the raw-edged join. You could use fabric glue, but I hand-sewed it to make sure it would hold with all the tension of putting the band on and off.

Note: this would be a great project for any book or journal. I'm thinking of making one for an art journal next!

If you make one, I would love for you to share it here!

Friday, April 10, 2015

Documented Life - Week 14

Week 14

Theme for April: Color Safari (Inks and Paints)

Art Challenge: Watercolors

Journal Prompt: "It's Water Under the Bridge"


The challenge this past week (yes, I'm caught up) was working with watercolors, something I'm not very skilled at.  I tend to mix them too much and end up with mud, or one color.  

I knew that the pages of the journal would probably not stand up to the watercolors, so I primed the pages with Golden Absorbent Ground. This is a medium that you apply to non-watercolor papers or surfaces to make them react well with watercolors. I was lucky to find an old jar in my stash from long-past painting days!  It worked well, preventing bleed-through to the backs of the pages and the watercolors did move nicely on the prepared pages.

After much fussing with the background, I decided to leave it as is. I wasn't totally satisfied but figured the more I worked it the worse it could get. I wanted more texture so I used a stencil and rubbed through it with a baby wipe to remove some of the color.

I knew my drawing skills weren't up to drawing a bridge, so I went with the idea of forgetting what was in the past and letting things go. The butterflies are supposed to symbolize that. 


I have saved several of these girl images from Christy Tomlinson's product packaging and decided to use one for the focal point. I collaged her head, painting over the face and hair to integrate it with the background. I also used some painted scrap paper for her dress.

This week I've been reminded that I must learn more about working with watercolor - and practice lots more too! Can't wait to see next week's challenge tomorrow!

Tuesday, April 7, 2015

Art Journaling/"Mix it Up" Product Play Day


"Mix it Up"
Product Play Day - Color Bursts

APRIL 14
10:00 am - 1:00 pm or
6:00 pm - 9:00 pm

We are changing things up a bit.  Join me next Tuesday for a Product Play Day (formerly Art Journaling Workshop)!  For those of you loyal art journalers, we will continue to play with products and learn new techniques. For those of you who are not art journalers, we invite you to join us to play and get messy! It is not necessary to have an art journal - we will provide specialty papers for you to work on.

This month we will be making creative "messes" using a new product from Ken Oliver Crafts - Color Bursts! These are very intense pigment powders which can be used in a variety of ways. Wait til you see these gorgeous colors and their unique properties!

I GUARANTEE WE WILL HAVE FUN!

Supplies to bring:

usual basic supplies
art journal (if you already have one, but not necessary)
non-stick craft mat

Please call the LBH (817-431-7930) or stop by the store to reserve your seat.

Documented Life Project - Week 13

March Theme: Making your Mark

This week's Art Challenge: Make Custom Element

Journal Prompt: "Ride the Energy of Your Own Unique Spirit"- Gabrielle Roth


I challenged myself this week by trying to incorporate more white space on my spread. I seem to always end up with heavy layers and every inch of the spread covered, so I wanted to try a lighter look. It was hard! I guess I just naturally want to keep adding...

For this background I used Dina Wakley's acrylic paints and her technique of spreading a thin layer of paint and using a baby wipe through a stencil to remove some of the color. I did this several times with different colors creating many layers. Then I overstamped with alpha stamps and a script stamp. The drips are a spray ink.

I used a handmade stencil of myself for the custom element. I made a copy of a headshot photo and cut it out carefully. Then I sponged black paint through to create a likeness of me.

The title was stamped with two different alpha stamp sets. The days of the week and dates were also stamped and the dividers between the days are old rubons.

I added some journaling along one of the drip lines on the right, added my info for the planner section and called it done!


Monday, April 6, 2015

Happy Easter - belated

I hope everyone had a blessed and happy Easter. We went to Albuquerque to spend the weekend with grand boys Drew and Grant. It was a fun and "egg-cellent" time. Drew was really into the coloring eggs/decorating cookies/egg hunts this year. And I got my cuddle time with little Grant who is filling out nicely and is almost 9 pounds!