"Art is my vehicle through life; may we share the ride together." Ron Wickersham

Wednesday, April 14, 2010

Catching up 2

Here's another past class - an inspiration journal made from a composition book. I used small squares of different patterned papers to cover both the front and back covers in a patchwork design. Then gesso was dry-brushed over to subdue and unify the patterns. Music paper was adhered to the spine, along with a punched brown strip for emphasis. It's tied with gold tulle with a little stamped tag pinned on. The title is a mix of alpha stamps, stamped on cream cardstock and heavily covered with Glossy Accents to look like clear tiles. "Journal" is part of a larger stamp which is stamped on a glimmer-misted wooden tag. The little brown tab is a functional decoration - a pen will fit. This was some elasticy "ribbon" that had wrapped a gift at one time (yes, I save most everything) that was perfect.

The back has more art words made from alpha stamps.
This is a peek inside the front cover and also shows an example of one of the divider pages. Patterned paper was adhered to the inside covers and the excess I cut off was used for pockets. The tag is stamped with a little art fairy stamp from Red Lead Studios which I love.


For divider pages, I tore two pages out of the book leaving about an inch at the spine. These pieces were glued together and then glued to the cardstock which was cut to size. I stamped all over with a very handy "stamp" - scrunched plastic wrap - for great texture! In the middle of each page I stamped various art stamps - this was a great project to use all those art-related stamps I collect. The tabs were made with a punch.
This was a fun project and I can't wait to start filling it with ideas.

Tuesday, April 13, 2010

Catching up

Here are the cards I made for a "variety" winter/Valentine card class which I can now share. The first one uses heat embossing on the tag and dry embossing with the Cuttlebug on the background. I like the unusual color combo for winter - turquoise, white and red with a touch of silver.

This uses a watermark red background, Perfect Pearls in the black background and red foiling (hard to see) just above the white eyelet border.
I like this combination of the kraft and pink colors. The heart is stamped, then covered with double-sided tape sheet, cut out and sprinkled generously with iridescent ultrafine glitter. It's gorgeous in real life!


The last card uses Distress Ink for stamping on the white background. On the top layer, the flower and leaves were stamped in Versamark and clear embossed on white; then Distress Ink was sponged all over - the embossed image resists the ink so when the excess is wiped off, the image "pops."


Sunday, April 11, 2010

Bird in House

No, this is not a current art project, but it is what I have been occupied with these past few days.

A mama bird has decided to make her nest and lay 5 bitty eggs in it in my front door spring arrangement! We have been trying not to use that door too much this past week so as not to disturb the nest.

One day when I let the dog out front, she flew out of the nest as I opened the door and scared the daylights out of me. Now when I do open the door, I noisily rattle the door before opening it so she can make her getaway.

Late last night when I was preparing to go to bed, I let the dog out front, making the aforementioned noises. She did not fly out so I figured she was out scavenging and opened the door. She must have been sleeping as she flew out, but flew straight into my house! My husband is out of town and this was 1:30 am, but I opened both the front door and the back door into the garage to have double the chance for her to get out. She was panicked and just flew around, alighting on the ceiling fan, drapery rods, a wreath hung high in the two-story family room, and the balcony railing. But she never came down and found her way out! After trying to shoo her out (have you ever tried to catch a "wild" bird?) I finally gave up and went to bed, closing all doors I could so she wouldn't get trapped where we would never find her.

This morning I again opened the doors wide, hoping her chirping buddies outside would call to her and lead her out. No such luck. Since I had to work all day, I figured I'd just leave the door into the garage open and hope she would be out by the time I got home. If I came home to her still inside, my last option was going to be calling animal control. (And I even wonder if they would come!)

However, just as I was walking out the door, she alighted on my kitchen chandelier and I attempted one last time to shoo her toward the door with a magazine. (Picture me - the "I don't do mornings" person rushing to get to work - waving a dangerous magazine wildly in the air at a teensy little bird!) Finally, she managed to make it out the door into the garage and I quickly closed the door to the house and opened the garage door. Now I hope she will find her way back to her nest and those still-to-be-hatched eggs. But, I must say, after this ordeal, I'm over the "ahh, cute little nest" thing and may just be moving that arrangement off the door!

Have a great day, everyone, and I hope you will learn one thing from today's post: don't put enticing, flowery decorations on your door in springtime!

Sunday, April 4, 2010

Happy Easter

Happy Easter to everyone! I hope you all are having a wonderful day with your families. Since our kids are all grown and live away, it will be a quiet one for us. How I miss those days of coloring eggs, hiding candy and then the big egg hunt in our backyard.

In honor of the holiday, I am sharing a simple little 5x7" collage I made a few years ago - torn papers, painted book text, vintage image and gesso.

Have a great day!

Saturday, April 3, 2010

April Project of the Month - Anthologies website

This is the card I made for the April Project of the Month on the Anthologies website (www.anthologiesbyme.com). Complete instructions are now up on the website in pdf format so that you can print them out if you wish. Any patterned paper can be used - I used a double-sided paper from one of Jillybean Soup's new spring lines. I love the soft, springy colors. This uses the new Tim Holtz Alterations Dies - the birdcage and bird and the two scallops. These worked very well in the Cuttlebug using only the two "B" plates. This pleased me as I won't have to buy another machine in order to use them!


Friday, April 2, 2010

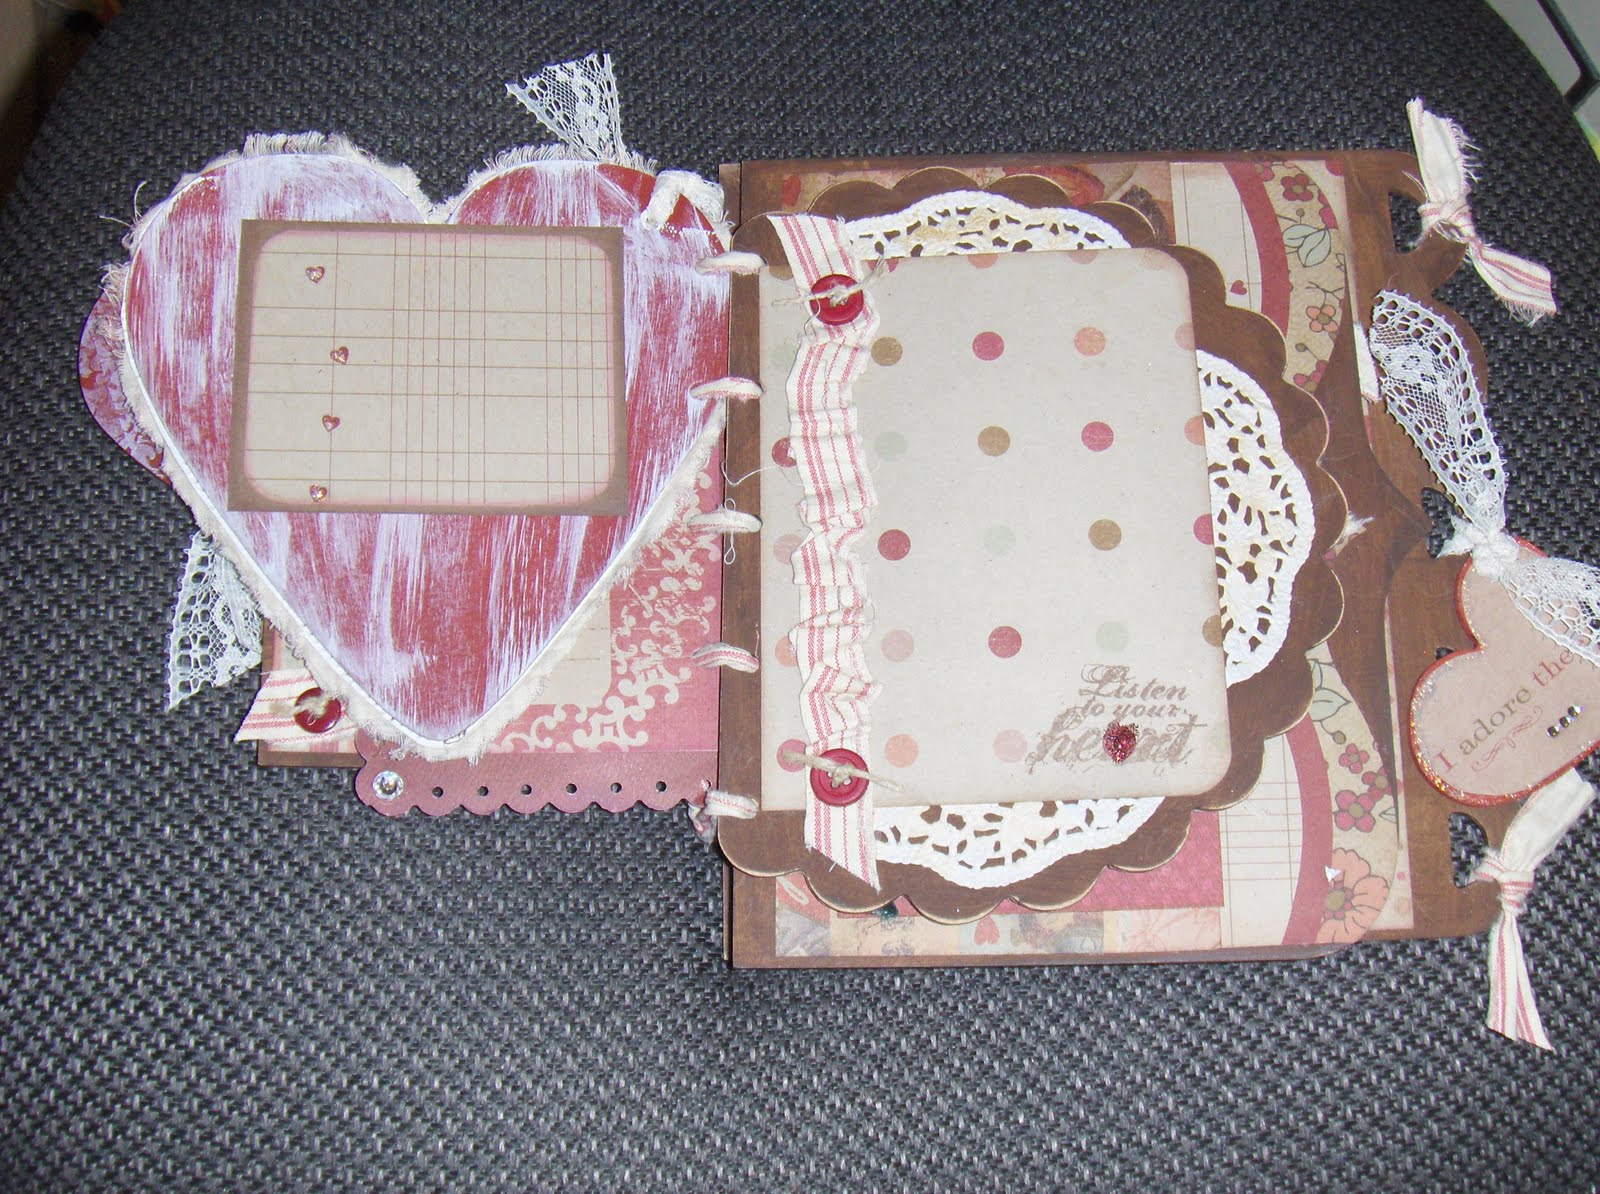
"Be Mine" Vintage Valentine Book

Since we are no longer offering this class, I can now share photos of the vintage Valentine book I created. The book is a masonite blank book from Kaisercraft, with different shaped edging on each page. These were all painted brown before adhering papers and embellishments. I used Fancy Pants' Vintage Valentine kraft papers which I love! There's lots of tulle, lace and fabric in this book.


I added a small border punched paper with two of the tags from one of the papers for the second page.

The third page is a heart-shaped piece of chipboard I cut and then sewed on a piece of ticking. (There were only four pages in the initial book, so I added more.)


For this scalloped page I added pieces of paper doily behind the paper layer.


I added an accordion-folded insert between the last two pages, made out of three kraft envelopes. Inside I tucked manila tags distressed with the "wrinkle-free distress technique" using Distress Inks. These next few photos show the various "pages" of the accordion insert.


On the last page, I used the large "tag" from the paper as a pocket in which I inserted more tags made with a double-dot paper. The heart hanging from the edge is the cutout from the cover.
Back page - I love the tag which says "PS I love you." The book was bound with strips of torn ticking fabric. I was surprised that this worked better than the rings that I originally was planning to use. The book opens and closes easily.

The end!

Thursday, April 1, 2010

Easter Cards

Easter snuck up on me this year! I just realized last Sunday that it was only a week away and scurried around to make my cards. Luckily I managed to get ten done and they are off in the mail now.

These were pretty simple. I used my new Stampin Up "Chocolate Bunny" stamp - isn't he cute? When I saw him in the catalog I just had to have him. Makes me think of all those chocolate bunnies in my Easter baskets years ago.

I mainly used alot of scraps and papers from some mat stacks I've had awhile. (I'm really trying hard this year to use up some of this stash.) Used some layering, ribbons, Stickles, oval punches for eggs, and some Cuttlebug embossing. The rabbits were all clear-embossed on either dark brown, medium brown or vanilla cardstock - I think they look like dark chocolate, milk chocolate and white chocolate bunnies, don't you?


Happy Easter!