"Owl" Treat Container
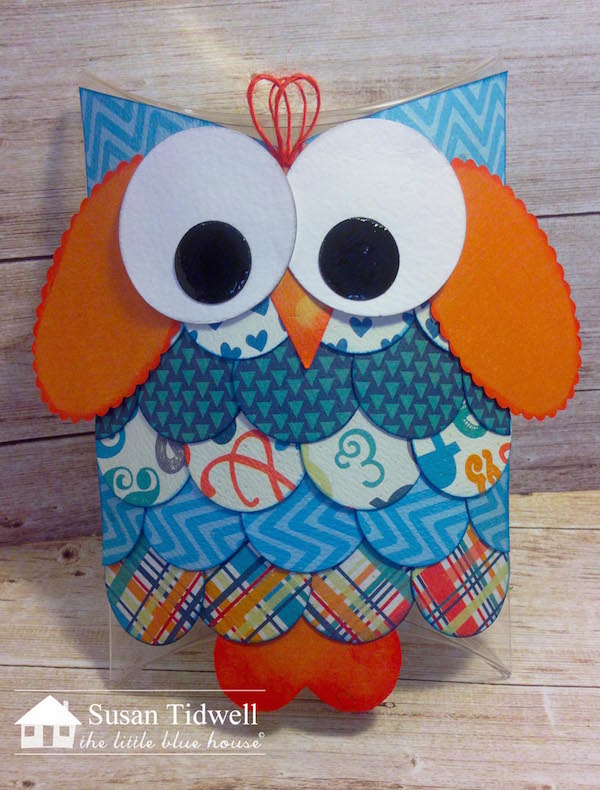
This month the LBH Media Team was given a clear pillow box and challenged to create something with the paper collections we received. I made this cute little owl treat container using all my scraps from the other projects for this month. I used the Authentique "Playful" Paper Collection which includes fun, bright papers and is available at The Little Blue House.

Here is a brief tutorial on how I made this little guy.
You will need:
clear pillow box
scraps of "Playful" paper collection
small scraps of white, black and orange cardstock
1 3/4" circle punch
3/4" circle punch
1 1/4" circle punch
small heart punch (about 1")
scalloped or plain oval punch or die approximately 2 3/4" long x 1 1/2" wide
6" dark orange thin twine
Scor Tape
blue, coral and black inks for edges if desired (I used Quick Quotes Blue Moon and Coal Miner and Abandoned Coral Distress Ink)
Glossy Accents

1. Punch 20 - 1 1/4" circles from five different patterned papers.
2. Punch 2 - 1 3/4" circles from white cardstock.
3. Punch 2 - 3/4" circles from black cardstock.
4. Punch small heart from orange cardstock (for beak).
5. Handcut one larger heart from orange cardstock (for feet).
6. Ink edges of punched pieces.


7. Start at bottom of pillow box and lay a piece of Scor tape across the width of the box. (Easiest to do if you keep the box flat while assembling.) Adhere feet first and then four circles across the width.
8. Continue adding tape and circles approximately one-inch apart so they overlap slightly. Note that for every other row you will cut one circle in half for the edges.
9. Cut one of your papers for the "ears" (measure on box) and adhere.
10. Tape ovals in place for the wings and the heart (point facing down) for the beak.
11. Layer black circles on top of larger white circles for eyes and tape in place.
12. Make a few loops with the twine and glue or tape in place between eyes.
13. Add Glossy Accents to the black circles if desired.
14. Open box and fill with your choice of treats!
All the pillow boxes created by the LBH Media Team are being featured on today's post over on The Little Blue House blog. Click here to see the amazing projects create by this talented team!
No comments:
Post a Comment