"Art is my vehicle through life; may we share the ride together." Ron Wickersham
Showing posts with label envelopes. Show all posts

Monday, June 1, 2020

"Waterfall" pockets using envelopes

This waterfall pocket is made with two business envelopes (#10). I cannot find the You Tube channel I originally found the tutorial on, but here is one if you want to see the actual construction. (https://www.youtube.com/watch?v=w663mrPlgZ8)  The top edge is cut off slightly to make pockets. One envelope is folded so there is one end longer than the other (this forms the top pocket and the back). The second envelope is also folded to form two more pockets. This is tucked into the fold of the first to form the waterfall.

I sewed the two envelopes together at the top fold and covered the fronts of the pockets with vintage wallpapers, vintage images and lace. The undersides are covered with tea-dyed paper for space for journaling.


The tags/journaling cards inside each pocket are book pages folded over and glued together to form a sturdy base then collaged with various papers and images. The backs are plain paper for journaling.


This can be slipped behind a belly band or tucked into a journal with a paper clip or even glued to a page. I love that it's interactive and not hard to create.


Wednesday, May 20, 2020

Projects for Junk Journals - Using up Book Pages

I've become a little obsessed with junk journals lately. The coronavirus stay-at-home orders combined with a yearly junk journal page swap I'm participating in has given me reason to work on many pages and ephemera. I've also been watching many YouTubers in the junk journaling community which has been very inspiring.

When you remove pages to reduce bulk when making altered books or when you gut books to use the covers for all kinds of journals, you end up with a pile of loose pages! I have an abundance to use up! There are all kinds of ways to use book pages and here are just a few I've tried.

First, you can make "origami" boxes. These can be any size, depending on your pages and can hold so many things. I will use a few for cut up bits or odds and ends in my art room. They could also be used for jewelry or little gifts or office supplies ...

These are made from a pretty standard book page and measure about 2" square by 1" deep.

A great use for book pages is for bases. They can be glued together to make them thicker and can be cut into tags, journaling cards, bookmarks, even pages for books and journals. Once they are collaged, they make beautiful elements.


journaling cards on doubled book page bases

tag and journaling cards all on base of book pages
(coin envelope in center has collaged book text)

Torn up pages can be used for collage or even collaged bases for mixed media art.


canvas for mixed media prepared with book pages and gesso


They can be folded or cut into many different kinds of envelopes and pockets. 


double pocket


vertical double pocket

Stamp to make new "paper".

stamped book page made into envelope


Cut out words from book text to use as titles or sentiments or poetry.


example from Pinterest


Die cut or hand cut to make paper flowers.


Use as "glue pages." When gluing elements, work on an old book page. When it's sticky just throw away and start with another - a great way to keep your work area clean.


Some other ideas (which I haven't yet tried):

make paper beads, then color as desired
shred and make handmade paper
shred and use as "filling" when shipping packages
use as wrapping paper
punch for borders
make feathers
make ruffles
make banners or tabs
weave for a background
use for paper mâché
stamp on them and fussy cut images
punch or die cut shapes

I'm sure there are more ideas out there. I can assure you, I now rarely throw away a book page!


Saturday, April 18, 2020

Storage folders

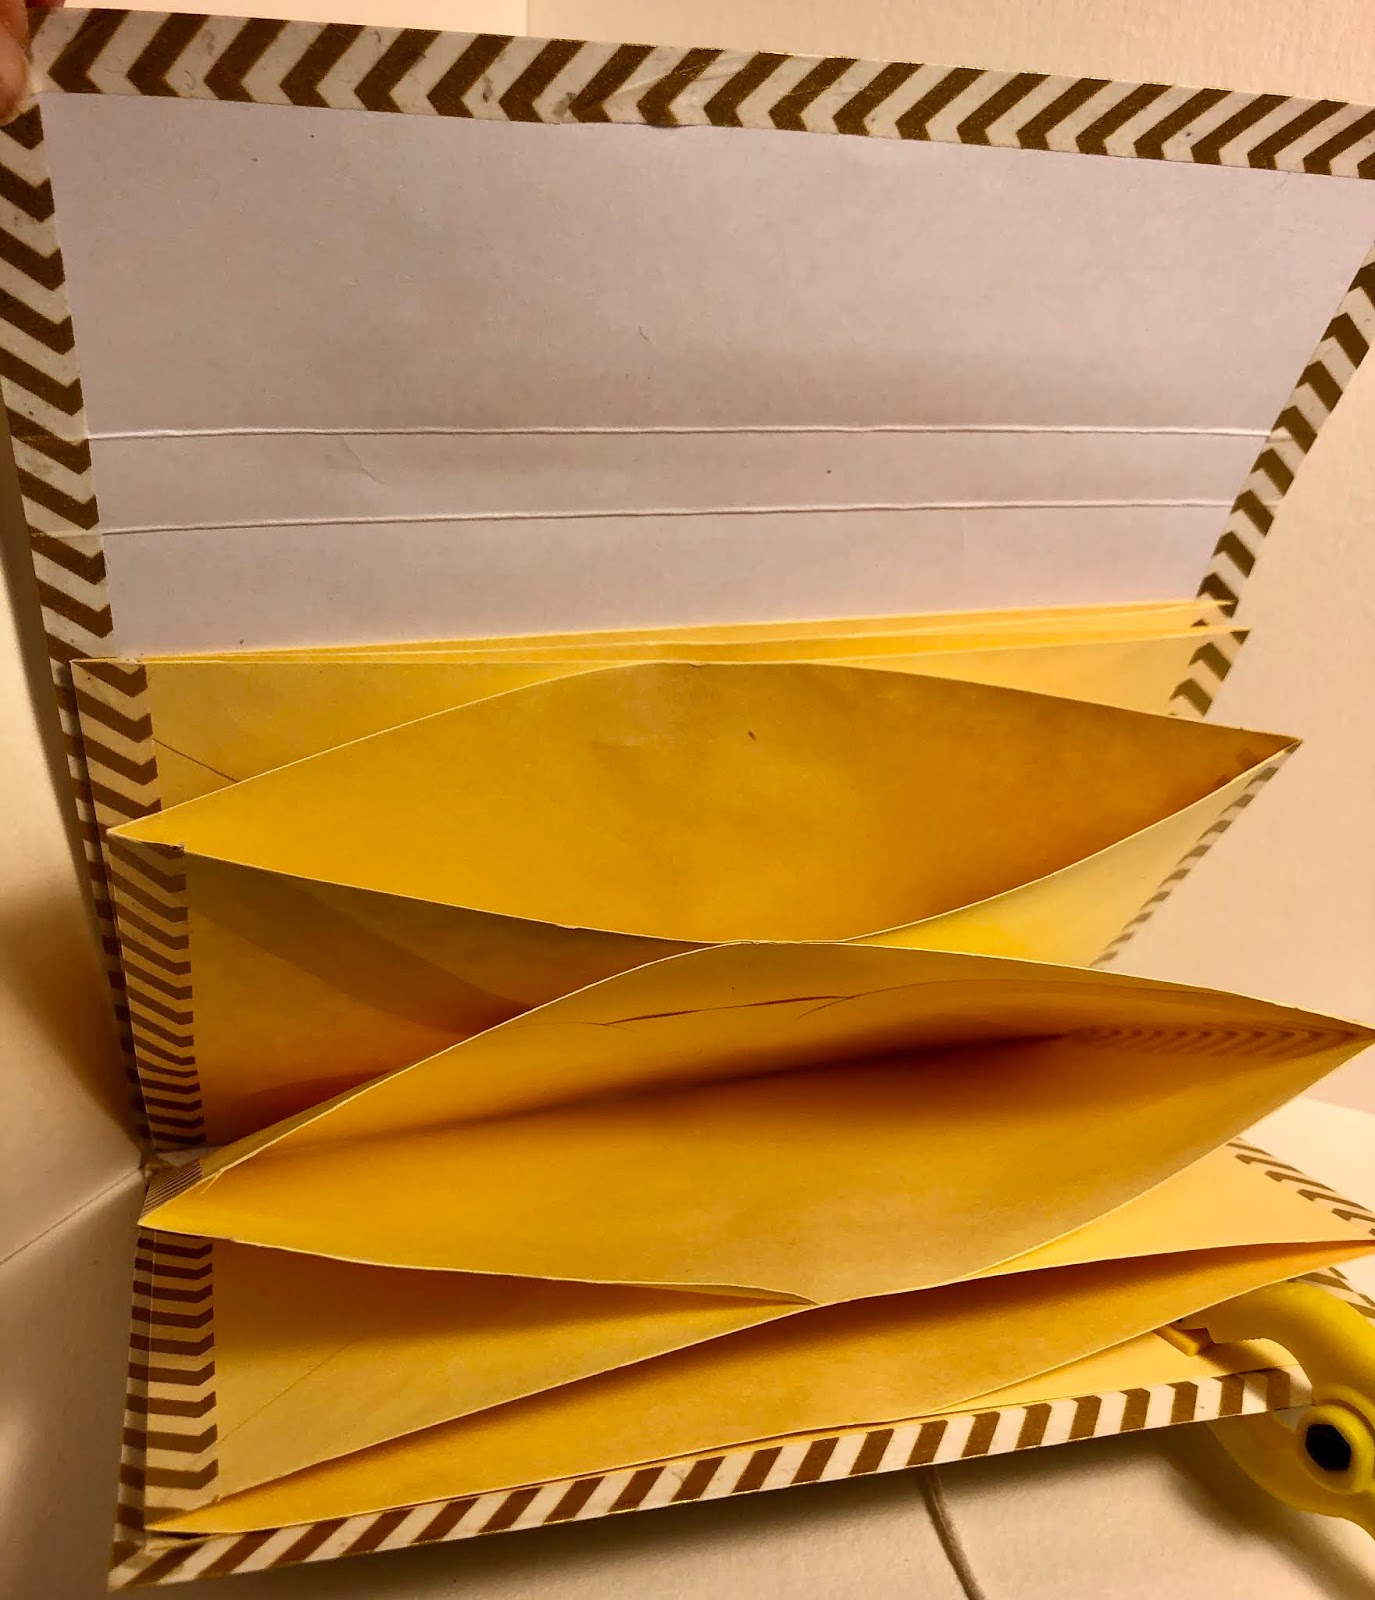
I made these little storage folders for bits and pieces using a tutorial from Wendy bMason on YouTube. She explains it better than I can and it's good to see a video showing the construction. Check it out here: https://www.youtube.com/watch?v=Eu00zMasT7k&t=1174s

In a nutshell, you use one piece of card stock or patterned paper for the cover/outside. Inside she used pieces of card stock folded in half with washi tape closing the sides. Instead, I used envelopes that I had and trimmed off the tops. I also used washi tape on the sides, not to close them but merely as decoration.  These are glued together just down the centers and then the ends glued to the folded cover.

The red one below is 8.25" long, just a bit longer than the envelopes I had. I used six and added a closure with bakers twine, a card stock circle and a brad.


This is the inside and you can see the construction somewhat.


For the second one, I used some old yellow envelopes that were approximately 6.5" x 4".  The folder is about 7" long.


And inside:


These were fun to make and used up a bit of my stash. They will be great for storing die cuts or other small items.


Saturday, October 28, 2017

Another retreat project - Christmas mini album

This is a Christmas mini-album created from long, black "policy" envelopes and bound with a coil binding.

Front cover

Pages 2 & 3 with a pocket made by cutting off one of the envelopes

Pages 4 & 5 - page 5 is the other portion of the cut envelope above

Pages 6 & 7

Pages 8 & 9 - page 8 is a regular black tag

Pages 10 & 11 - page 11 is a larger envelope with a flap

Pages 12 & 13 - Page 13 is a small, hand-cut kraft tag

Pages 14 & 15 - page 15 has a pocket at the bottom
created by a piece of patterned paper

Pages 16 & 17

Last 2 pages - page 19 is the inside back cover

I have set this to post while I am away. We are currently in Kansas City to celebrate my 
mother-in-law's 90th birthday! Kelly and her two boys are joining us and great-grandmother 
will get to meet 2-1/2-year-old Mitchell for the first time.

We will return just in time for Halloween. We'll be going down to Austin to trick-or-treat with the grand boys!