"Art is my vehicle through life; may we share the ride together." Ron Wickersham
Showing posts with label projects. Show all posts

Thursday, May 7, 2020

Annual Art Retreat

I am part of an online art group with members all over the country. There are only about 35 of us and each year for the past  years we have gathered for a long weekend retreat in Grapevine, Texas. Approximately 20 members usually attend and we make art, create books, eat yummy food and celebrate the great friendships we've made over the years.

This past weekend was supposed to be our 2020 retreat which, of course, had to be canceled.  Our fearless leader, however, managed to plan a wonderful virtual "Pitiful Party" for us.  We had several Zoom meetings (with between 12 and 15 members participating); an art room scavenger hunt where we gathered the items and then posted a photo online; several games including Covid Bingo and word searches; a few art projects; posts of art tips and techniques; prizes and just plain fun. It was not a substitute for the real, in-person thing, but a great alternative nonetheless.

We created "scrappies" to swap with each other. These are just bundles/layers of scraps of papers, lace, fabric, ribbon, buttons, etc. stapled, sewn or glued together. They can be partially glued to journal pages as tuck spots, can be added to a paper clip for a fancy clip or used as an embellishment for a pocket or page. They are quite addictive to make and use up lots of tiny bits.  I made these four:


One gal shared a "make and take" with us using an upside down tag to make a cute bird hanging. She sent out some images and a list of the supplies she used and then we used whatever we had to make ours.  Mine came out similar to hers.


Another activity was to take a card we had received sometime and recycle it into another card. We then sent these to our leader who will deliver them to a nursing home. I have no idea when I received this card or from whom but I had saved the card front. I cut it down, layered it on dark card stock and then mounted on a tan card and added fibers.


This is just a hint of the fun we had. The best part was seeing everyone on Zoom and having great conversations during these stay-at-home days.


Tuesday, December 11, 2018

Back again

More apologies for missing another few weeks. We ended up in Kansas City an extra day over Thanksgiving due to a huge blinding blizzard that moved through Kansas and Missouri. We finally arrived home late Monday night after scurrying for flights through Denver and Oklahoma City. Then on Friday we left for the weekend in Chicago to visit our youngest daughter. 

I promised photos of the projects we did on our recent retreat. Ten ladies attended and each brought a project with kits for all to do. During "down time" we also completed at least twenty cards (everyone had brought a minimum of two samples with kits).

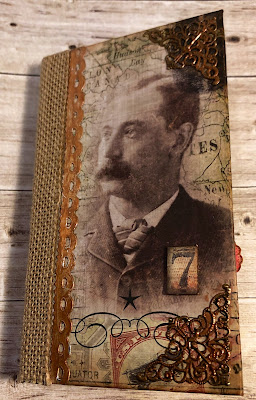
This was my project. I altered a cigar box. The outside is covered with all things textured - keys, buttons, texture paste through stencils, metal washers and nuts, corrugate, rickrack, drywall tape, lace, gears etc. I also added a Tim Holtz "Found Relatives" card. Then I covered everything with small cut pieces of aluminum heating duct tape. Here is a photo of the box before adding the tape.


Once the tape was adhered, I burnished is very well, getting into all the nooks and crannies of the texture. I also used a small sewing tool for creating a dotted line texture especially around the photogragh. Then I painted over all with black acrylic paint, let it dry slightly and wiped off the excess.  Here are two photos of the finished box.


I covered the inside with a patchwork of Tim Holtz "Torn Wallpaper" and added metal feet to the bottom corners.


Here are the remaining projects, in no particular order.


Snowman "Jack in the Box"


Vintage Book with Photos printed on Tea Bags


One inside page


Tall "Love" Explosion Box


Inside


File Folder Book


One inside page with pockets and tags


Small Book Made from Library Pockets


Two inside pages/pockets with "found relatives"


 Christmas Shadowbox


Christmas "House" Shadowbox


Christmas Countdown Canvas

Tuesday, April 5, 2016

Pinterest Party and Girls' Weekend

I spent this past weekend at my friend's house near Waco, Texas, about two hours from here. She invited 7 gals to join her for a Pinterest Party. Everyone brought a project inspired by Pinterest, complete with kits for all, and we created some fun things.

Two gals made their projects beforehand and gifted them to us. One was a DIY "Poo-pourri" spray and the other was a package of DIY essential oil "bombs" for the shower. Both included recipes so we can re-create these on our own.

First up was a beautiful project using an old Graphic 45 paper collection, "A Lady's Diary." These papers are still my favorite collection from G45.  I hesitate to call this a card as it is much more elaborate. It's a trifold with a "belly band" for a closure. Isn't it gorgeous?


Here you can see it open. Love it!


This is a decorated gift bag using a Julie Nutting girl stamp and paper scraps. We colored the skin with colored pencils and stamped the doll a second time on patterned paper for the dress. I think this would be darling on a canvas as well.


This was a simple card but with such an impact. The flowers, lace and satin bow just add such special elegant touches. It's very dimensional so would probably cost a fortune to mail! But I doubt I will be parting with this for awhile.


This was another scrap project done on a canvas. We simply hand-cut different sizes of pointy ovals and Mod Podged them in place.  This is a great idea for using scraps and would be fun on different colored backgrounds. I can just see it on black making the colors really pop. This canvas is 8"x10" but how cool would this be on a huge canvas!


And this was my project - a spring banner.  The pennants are paper rectangles with one end dove-tailed. The letters are glued to die cut scalloped circles. Holes are punched in upper corners of each pennant and then threaded on twine. Torn fabric strips are tied between each pennant. Simple but sweet.


This was such a fun party. There are so many ideas on Pinterest - I suggest you gather a few friends and host your own Pinterest Party!

Thursday, October 29, 2015

Today's the Day! "Gather Together" Front Porch Kit is in the House!


This is what you've been waiting for - check out all the cute goodness in this latest Front Porch Kit from the Little Blue House! It is filled with fall papers, coordinating cardstock, ribbons, yarn and twine, tons of embellishment pieces, vintage pages from a recipe book, doilies, cupcake wrappers, a mason jar lid and even a pie pan and a cute little fork and spoon! So many possibilities for creating  with this kit! I love all the different directions the design team went with this one.

For my projects, I first created a "plaque" with the pie pan surface to sit on an easel or hang on the wall. There's room for a favorite photo and a little tag for listing things you are thankful for.


Next up is a cute shaker card using the packaging from the "chips" - the ephemera pieces. I punched a few tiny leaves from the papers, backed the front of the package with a dotted paper which I also used for a punched border to cover the packaging label, and filled the leaf window with some of the beads included in the kit. The burlap was the only remaining piece of ribbon I had after using it on my layout!


This is a little treat bag made with one of the little brown paper sacks. I folded both the foil and the orange paper cupcake wrappers over the top for a decorative closure, tied a bow with twine and added the button. I punched one of the cards to fit inside the mason jar lid and it's also backed with another printed circle for adding "to" and "from" when gifting the goodies.  I used the second bag as a border wrap and topped it with the printed canvas piece.


And, finally, here is the single layout I made using some of the pretty papers, ribbon, recipes and recipe card and some of the "chips."


I love, love, love this kit and I think you will too! Check out the projects IRL at The Little Blue House, and pick up your kit! You can order online at www.thelittlebluehouseonline.com or call the store at 817-431-7930.


Friday, August 1, 2014

Retreat Projects

While at retreat we created a few little projects, keeping with the 1920's theme. First up is a "Powder Puff" made with vintage fabrics, trims and flowers that Joan pre made with ribbons and lace. We assembled it on a ribbon-covered dowel, but I'm thinking I will remove that and use it for a beautiful pincushion. It's big - about 7" across. Did they really use these things in the 20's??


The, of course, we had to make headbands for the occasion.


We created collages on 8"x10" canvas boards with packets of supplies that were provided. All the collages were so different despite being made with similar supplies.


We always have a swap of some kind, also keeping with the theme. This year we brought small artworks ranging from 3" x 3" to no larger than 4" x 6" to exchange with everyone.  I made mine 4" square using one of my favorite stamps. I watercolored the background, embossed it and then also watercolored the stamped image.


All the artwork together on a ring - we wrote messages to each participant on the backs so this is a wonderful memento of the weekend.


 And the remainder of the cards. I love that they are all so unique!


Monday, August 12, 2013

Final Sneak Peek (#3)

This is the last day of sneaks - tomorrow will be the full reveal!


This is a portion of one of the projects that I created with the surface included in the kit. How many products can you see? Can you guess what it is? 

And, just because, here's one more sneak of another project.


Be sure to check back tomorrow to see the entire kit! I can't wait for you to see the fun products and amazing samples the Design Team created!