"Art is my vehicle through life; may we share the ride together." Ron Wickersham

Monday, March 30, 2009

Oh Joy!


The banner that I had won on Aileen's blog, came in Saturday's mail. It is adorable! The pennants are each approximately 3" by 4", not including the bottom tassels, and the colors are very bright and cheery. I love it! The photo doesn't show just how vibrant this is. It's so much fun to win something, especially handmade art, and to get fun mail. Thank you Aileen!

Sunday, March 29, 2009

"Irresistible" techniques

For our "Dusty Stampers" class on Tuesday the focus was on resist techniques. Rather than just present the techniques and the students return home with loose samples, I decided to have them also make a small booklet with tags. And, because the original class was scheduled for St. Patrick's Day but canceled due to spring break, I'd already planned on a "green" (recycling) theme.
This little booklet uses two recycled #10 envelopes (the ones that are usually included in junk mail or bills) and some small scraps of patterned paper and cardstock, ribbon and, of course, stamps and inks.
Here's the front cover which uses the "white pigment ink resist" technique. First stamp with white pigment ink on glossy cardstock, let dry slightly and then sponge on one or two dye or Distress inks. Wipe off excess ink. This results in a subtle tone variation. Can you see the other recycled item? It's the "buckle" which is a pop top from a soda can.


The first page shows the "watermark resist" technique where the image is stamped with Versamark ink, again on a glossy cardstock, and, without drying the Versamark, a dye ink is brayered over the cardstock. The more color that is added the more visible the image becomes. As you can see, this also is a subtle look as some of the ink does stick to the Versamark. In this picture you can see how the book was put together. Each envelope was cut in half and the flap stuck down. One end was then cut approximately 1/2" in from the end on the fold. One side is folded down with a strip of patterned paper attached with eyelets. A small piece of patterned paper was added to the other side (inside the envelope) and then tags were cut from cardstock to insert in each page with the technique written on it. The original envelopes are not visible at all as the fronts and backs are completely covered with either the technique sample or patterned paper.


The next page is the "embossed resist" technique. The image is stamped with Versamark and then embossed with clear or white on white glossy cardstock. After heat embossing, dye ink is brayered over. This results in a very distinct resist and a much clearer image. I used the same stamp for both this technique and the previous one to better show the difference.


The third technique is the "crayon resist" technique. The image was stamped with black permanent ink and then a white crayon was used sparingly to draw in highlights. This time the background was painted with Luminarte's Twinkling H2Os (shimmery cake watercolors). The waxy crayon resists the watercolor. It's hard to see in the picture, but this results in a beautifully rich shimmery color.


The last technique is "paint resist." White acrylic paint was sponged evenly on the stamps (I used various sized circles) and then stamped on regular cardstock. The paint was dried with the heat gun. Once it was dry Distress inks were swiped across the page and any excess ink was wiped off. This results in a more subtle resist as well, depending on how much paint and/or ink is used. You can also see that the Distress ink soaks into the regular cardstock faster than glossy and is harder to blend.So there you have a handy little reference booklet for a few resist techniques. Of course, there are many more and, if desired, this book could be added to by using more envelopes!

Thursday, March 26, 2009

More Graphic 45

I am just loving the new Fashionista paper collection of Graphic 45. My friend, Tracy, had her birthday last weekend and I made her this little hanging using several of these papers. They are so beautiful - on both sides - that it's very hard to cut into them! I am going to have to get more just to look at (LOL). I stamped the "make a wish" on a piece of file folder and then folded it so it would be three-dimensional. The base is lightweight chipboard and I sewed through all the layers around the edge and used vintage black ribbon as a hanger. I can't remember where the vintage image came from, but I just love that little girl.

I also made her this card using kraft cardstock, a Martha Stewart punch and a single damask stamp which I repeatedly stamped to make the background.


Wednesday, March 25, 2009

It's my lucky month!

March has been a winner for me - literally. I've "won" the OWOH giveaway which I posted about on the last post as well as the "Joy" banner from Outside the Margins. And late last night I was notified that I had won the random drawing on Beatriz Jennings' blog (http://www.iralamija.blogspot.com/)! She is giving away two sets of papers from the two new paper collections of Marks Paper Company, a new company. I'm not sure if I will receive the August or Old Fashioned papers, but they are all beautiful so I don't care! This is so, so fun!

If you want to see some gorgeous cards, check out Bety's blog. She uses alot of Melissa Frances papers and products and her work is very soft and feminine. I love her "look."

And what did I accomplish today? Two good friends came over and we did an assembly line production of 115 save-the-date cards for my daughter's upcoming wedding. They are finished and ready to be mailed! Yeah!! Thank you Julie and Cathy - it would have taken so much longer and not been half as much fun without you.

Monday, March 23, 2009

Great mail today

Look what the mail brought me today - not one, not two, but three gorgeous pieces of artwork!
The first is a rak from a friend, Joan, in one of my online groups. The wing of the butterfly is detached - so cute! This springtime collage is 5 1/2" by 8 1/2" and hangs with a beautiful piece of green/gold lace (which you can't see in the photo). What a wonderful surprise!

The following two collages arrived by "royal post" all the way from Scotland. Back in February there was an online blogging event called OWOH (One World One Heart) in which more than 200 bloggers participated by giving away prizes on their blogs, randomly chosen from those who visited and commented. I was notified awhile ago that I had won one of Gillian's collages on www.scrappy-doo-gilliam.blogspot.com. Since she was giving away three in all, I didn't know which one I would receive, but I loved all of them. Today I received not one, but two collages, both of which I am tickled to have!

This first one is a 5" square framed rusty metal screen which has been painted various colors and lots of goodies added. I just love the wording "I love rusty, chipped, faded, peeling, frayed, faded things.


I have no idea why I received two, but I wouldn't part with either! This one is a 5" by 7" canvas with many layers of paint, fabrics (?) and beads, glitter and even dried lichen. This photo doesn't do it justice - it was hard to get a good photo showing all the glitz and shine. Isn't that little girl so sweet? Thank you Gillian! Be sure to check out her blog - she does some amazing work. Yes, it was a very good mail day.


Saturday, March 21, 2009

Easter and Spring cards

Spring is officially here and it certainly feels like it in Texas. In fact, a few days ago it felt more like summer, so I'm glad it cooled down a bit. Here are the spring and Easter cards I designed for my next card class which starts next week. I always try to incorporate some techniques in the card classes and this time there are several "coloring" techniques.


Friday, March 20, 2009

I won!

I had totally forgotten about commenting on her blog post for a giveaway until I received a congratulatory e-mail today from Aileen (www.aileensmusings.blogspot.com). I won a darling "JOY" banner - check out her blog to see it. Aileen also is the owner of a great online store, www.outsidethemargins.com, that has a great range of products. Now I will be stalking the mailman until I receive my wonderful prize. Thanks Aileen!!

Wednesday, March 18, 2009

Christmas in Mexico Album - finished!

I wanted to make a special album for our memorable Christmas 2008 family vacation to Mexico. Those of you who know me well know that I don't do much scrapbooking, but I managed to get the important photos and events into this little Bo Bunny "BEACH" shaped word album. I had seen a sample of this at a local scrapbook store, Crafty Scrapper, and basically used mostly the same papers as the sample. Of course, I added lots of extra embellishments and ribbons. Every time I look at this I will remember the wonderful times the nine of us had!

Tuesday, March 17, 2009

Happy St. Patrick's Day!

I hope everyone enjoys a great day today - are you wearing green? Two of my daughters live in Chicago and that the city has a great tradition of turning the river green for several weeks to celebrate.

I've been a few days without my computer. For some reason, the keyboard went crazy and typed different letters than what I typed! After a call to Dell support and being told it would cost me $50 to talk to someone, my hubby got serious about looking into the problem. He reinstalled some drivers and I'm back in business! Try to do a google search without half the alphabet or, have you noticed how many words have an "i" in them?

Saturday, March 14, 2009

Happy Birthday Trisha!


My friend, Trisha, has a birthday coming up on St. Patrick's Day and invited a bunch of gals to her birthday party today. What a totally fun, happy day! I don't remember the last time I went to a peer's birthday party! Above is Miss Trisha decked out with her birthday princess "tiara", wand, pin and 2 boas!
We carpooled toWaxahachie, a little town east of Dallas, and first stop was at Mosaic Madness, a do-it-yourself mosaic studio. We each chose a project, broken china pieces and tiles and proceeded to cut, smash and glue down lots of bits and pieces. I chose to do a small bird house shown below. It hasn't been grouted yet as the mortar has to dry and cure for 24 hours. I will grout it tomorrow and also paint the bottom.


After a fabulous lunch at the Dove's Nest just down the street (the cutest ever restaurant combined with a fantastic shop), we then convened on the Crafty Scrapper next door. This is the greatest scrapbook/stamp store ever. They are fully stocked and even had lots of new winter CHA products. We made a canvas project with new house stamps from Paper Artsy (from England) and each person could personalize it with their own house number. I just love this piece!
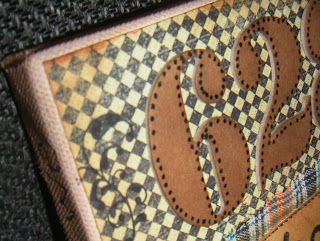
I'm sorry for the glare in the picture. Those hearts were punched from art metal. The corrugated metal "fence" along the bottom are some kind of corrugated fasteners from the hardware store. The plaid layer behind "home sweet home" is fabric.
You also can't see the sides of the canvas in the first photo, but we handprinted "As for me and my house...we will serve the Lord." The house numbers were inked and then outlined with dots using a black glaze pen which you can see in this closeup shot.
But we still weren't done! We had red velvet cupcakes with cream cheese frosting complete with a shamrock on top and then received goody bags. Look at all the goodies Trisha managed to stuff into this bag! She decorated the paint can which held lots of the embellishments, made the bag topper for the green M&Ms with the new SU Top Note Big Shot die and even covered the pen (on the far right) with green ribbon, topping it off with the white and green ribbons and shamrocks on top.What a fabulous day! I am overwhelmed at Trisha's generosity and for inviting us to help celebrate her special day. There's nothing better than being with girlfriends and arting the day away!

Wednesday, March 11, 2009

Scrapstashers projects

Yesterday was the monthly "Scrapstashers" class, where we receive a list of supplies to bring from our "stash" and we do a mystery project.

Since the big push lately is to Reduce, Reuse and Recycle, we were to bring empty ribbon spools to class. The first project is a little treat container made with two identical size spools. One side of the spools were removed and patterned paper strips adhered to the cardboard "spool" part. A coordinating paper was adhered to the ends of each spool. A heavy acetate piece was rolled and the edges taped together and then inserted in the bottom spool. Ribbon was threaded through a hole in the bottom spool, then through a button, and then back up through the hole. The two ends of ribbon were pulled through the tube and through a hole on the top spool and tied in a bow. To open, you untie the ribbon and pull the spool up enough to remove the gift inside. This would be adorable as a baby gift, with little booties inside. Candy is another great option or maybe a small gift.

The second project is a little spool "topper" that can be used on top of a wrapped present in lieu of the bow. Or, it could be sent as a little card substitute. Patterned paper was adhered to both ends of a wider spool. Around the area where ribbon is usually wound, we adhered two strips of coordinating cardstock (end-to-end). This is enough to go around the spool completely to cover the cardboard and then have a leftover length to wrap around some more - you can stamp or write your special message on the undecorated side. I added ric rac to the outside. On top is a bow of tulle, layered with flowers and a button. If you cut the cardstock strips the exact width of the spool, the end will stay by itself when wrapped around.Aren't these just the cutest little projects? I just love going to Scrapstashers - the mystery of it is so fun and it's great to get ideas for using up some of the stash we all have in our art rooms! And, everyone's finished projects are so different, depending on their stash!

Tuesday, March 10, 2009

Boo hoo

Have y'all heard of the paper company, Graphic 45? They have GORGEOUS papers - vintage with a modern touch. I just love all their lines. They recently had a call for additional design team members, so I applied, along with a zillion other paper artists! Yesterday was the announcement and I am so bummed - I didn't make it. :( But I must admit that the six new members are fantastically talented and do amazing work. You can check out the Graphic 45 blog here and follow the links to the blogs of all the design team members.

These are two of the projects I submitted. The first is a 6" square black card. The fashionable woman and words are stamps, the lace is vintage and four of their papers are layered. I loved how my stamp matched the tan background paper. All the papers I used for both projects are from the Fashionista collection.

This is a layout of my mother circa 1946. I used regular old corrugated cardboard for the base and, again, several Graphic 45 papers, grungeboard, wire and the new Claudine Hellmuth sticky back canvas.

Sunday, March 8, 2009

Small Alphabet Stamp Storage

Is it just me or are the days and weeks passing by way too quickly? It seems like it was just Christmas and here we are coming up on mid-March! I simply do not understand people being bored and having nothing to do. I don't have time to be bored! This week was spent designing, teaching, creating - but I can't show any of it right now!

I thought I'd mention a great idea for storing small wood-mounted alphabet stamps - the kind that come mounted on small wooden "pegs." I could never get all the stamps back in the original box they came in and if I found another box for them, they would jumble up. I like having the alphabets in order when it comes to stamping words. I heard about this storage solution several years ago and I just love it - ammunition boxes! These boxes are small square boxes with individual dividers sized for different calibers of bullets. The ones I bought are for .44 or .45 (whatever that means!) and have 100 sections, enough for three complete alphabets plus extra punctuation. My box is named P-100 Series and the website listed is: http://www.mtmcase-gard.com/.


I purchased mine at a sporting goods store in the hunting department. At the time I was looking, I could not find them at Walmart. Just be prepared for some strange looks if you go shopping for these with your kids in tow!

Here are pics of the box closed and open. These are perfect for the little $1 sets of alphabet stamps from Michael's. I also have sets from PSX, Image Tree and Hero Arts that fit. And, as I said, there are different sizes so those might also fit larger stamps.

Monday, March 2, 2009

Winter returned to Texas - and misc

After hitting 86 degrees on Thursday and we were tempted to turn on the AC, this weekend turned cold again, at least for Texas. It's been in the 20's and 30's overnight and we had to cover the plants! There's a saying in Texas that if you don't like the weather, just wait a bit and it will change. So very true. Now that Mother Nature has gotten that out of her system, I hope spring is on it's way.

I worked on a few projects this weekend and today for a submission to a design team. I have a few more days until the deadline and I still need to do at least one more project. I'll share them later once I've submitted them.
On my last trip to Michael's, I found new punches. These are made by EK Success and are ingenious. They lock for storing and are stackable. There were lots of designs that I haven't seen in other companies' punches. They are also fairly reasonable, especially if you use a coupon. The regular punches are $9.99 and the borders are $14.99. This is the one I bought to try out.

It worked well, punching easily through cardstock. I really like that they have labeled the side of the punch with a picture of what it looks like. The photo below shows it in a locked position which is flat and smaller than when it is opened. The little turquoise button on the bottom is the lock.

I noticed that there is even a divided plastic storage case for the regular punches. Maybe they will come out with one for the border punches as well. I think this is a great new idea and especially like that they are so much easier to store than the older punches. Now I'm just wondering how I can justify purchasing these when I have drawers full of the other ones!