"Art is my vehicle through life; may we share the ride together." Ron Wickersham

Monday, December 23, 2019

Tutorial - Using up scraps and extra book pages - journal cards

As you can imagine, when creating altered books and removing pages to eliminate bulk or when gutting a book to make a new journal you are left with many excess book pages. I have discovered a way to use and recycle these into a functional project - journal cards for junk journals or December Dailies, etc.

First, I always have a stack of book pages next to me when gluing projects. I lay the object being glued on top of the pages so extra glue stays off my work space. When the top page gets too "gluey," I fold it in half, lay it aside and continue with a new page.

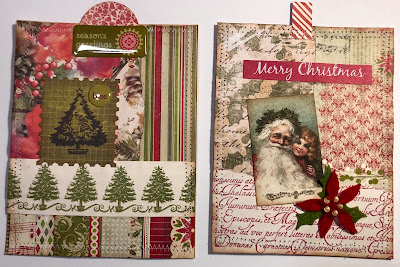
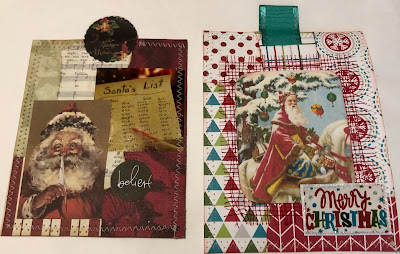
To make journal cards, you can glue a few of these folded pages together and use them as a base for other scraps and images. Once they are completely collaged, you can leave them as rectangles or cut them into tags. You can staple or glue a folded piece of paper or fabric or lace or ribbon to the top for a tab. Or you can punch a hole and add ribbon or trims.

This is a great way to use up bits of paper, ribbons, stickers, word strips, fussy cuts, die cuts etc from your stash. These measure approximately 4-5 inches wide and 5-6 inches tall and are a great size for many uses.

I usually add a blank piece of book page (there are usually several at the front or back of books as well as sometimes at end of chapters) to the back to provide a blank space for journaling. I also sew a straight or zigzag stitch around the outer edge. This is not necessary as everything is glued, but it adds a decorative touch and finishes it off nicely.

Here are several Christmas ones I've done with scraps left over from my December Daily. I've added several to my book already. 


I hope you enjoyed this simple tutorial for using up book pages and your stash. It's always good to recycle!


Friday, December 20, 2019

More "12 Days of Christmas"

These are the little gifts I've received so far for the "12 Days of Christmas" swap.

Day 2 - a lovely, very intricate die cut angel ornament


Day 3 - a hand-stitched wool felt "mug rug"


Day 4 - a wonderful wooden Christmas sign


Day 5 - a cleverly wrapped set of chocolate treats


Day 6 - a darling double-sided metal house-shaped ornament


 and Day 7 - a pretty ornament of layered burlap, lace, paper doily and paper image


Each project is so different from the others. I love that 12 people can participate and there are no duplicate ideas!  There are still five more to go!

Wednesday, December 18, 2019

December Daily - Days 12 - 18

Days 12 and 13 

The little red truck background on Day 12 is tissue paper. I added a buffalo plaid pocket with washi tape that was on an envelope I received. The card inside the pocket is one that I made last year at a retreat from another gal's sample. I love it so much I know I will never send it and it was perfect for the journaling on this page.

On Day 12 I used scrapbook paper on the background and added a paper gift bag I bought this year. Inside is a large tag I made from scraps for journaling.


Days 14 and 15

Day 14 is when I was at a friend's house for the weekend and she had an open house on Saturday. At the upper left I glued on her invitation, leaving the right side open for a pocket and a journaled tag. At the bottom right corner is one of the little gift card holders we made at her party. Inside I stuck two tags - one for journaling and one for a tiny photo of the second gift for the 12 Days of Christmas swap I'm in. I also added a photo of some of us crafting that day.


Day 15 has a drop down gift card holder that was a make 'n take at the Little Blue House several years ago when I was teaching there. Inside I added some of the packaging from my third day's gift along with its tag and a little photo.


Days 16 and 17

I added a ribbon vertically to Day 16's page and used it as a "belly band" to hold a beautiful handmade card I received. I taped the side and bottom of the card to make a pocket and added a tag on which I placed a photo of the fourth day's gift of the swap.

The background of Day 17 is kraft wrapping paper with candy canes. I thought that was appropriate for that day as it's when my friend and I made candy cane cookies together. I journaled on the back of the candy cane card front and also used a recipe card to journal more about our family's tradition of these cookies.


Day 18

Day 18 has a plaid scrapbook paper background with a slanted pocket at the bottom. I decoupaged part of a poinsettia napkin on the pocket and also added a little postmark that was from the wrapping of my fifth day's swap gift. Inside the pocket I placed another handmade card I received along with the tag from the swap gift (I placed a photo of the gift on the back).


We are leaving tomorrow for a week with our family in Sedona, Arizona. All but one daughter will be with us for Christmas week. I will try to pre-schedule a few posts for when I'm gone.

Merry Christmas everyone!

Saturday, December 14, 2019

12 Days of Christmas Swap

I'm participating again this year in my online group's annual "12 Days of Christmas" Swap. Twelve people sign up and then make 12 gifts (one per person) for the day they are assigned. We mail them out and then starting on the 13th of December we open one gift per day until Christmas. This is always a fun swap and one I look forward to every year. It's amazing the unique and diverse gifts we receive.

This year I was assigned Day 1.  Since all my gifts should be opened by now, I can reveal what I made.


These are little heart ornaments or hangings made from a base of corrugated cardboard. I lightly swiped the cardboard with modeling paste, then collaged on a piece of lace, music paper, a large snowflake and some wide gold mesh ribbon. I sewed a copy of a cute vintage image onto a piece of muslin and stamped the word believe on another piece of muslin. Once these were adhered to the hanging, I added a small ribbon flower and used pink silk ribbon for the hanger.


 They look even better all together!


Thursday, December 12, 2019

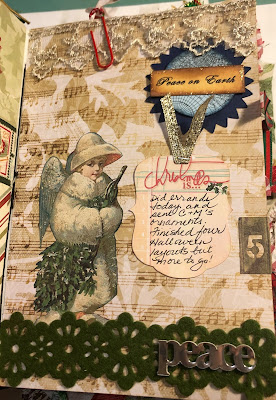
December Daily - Days 5-11

First of all, this happened yesterday. Isn't he a cutie? He's seven and losing his teeth late. He had only lost two until a few weeks ago when he lost one of the top teeth. We teased him that he needed to lose one more so he could sing the Christmas song. Well, yesterday the other one came out and he was so happy!


(with little brother's accompaniment in the background)

Now that we're over the cuteness factor, here is Day 5 in my December Daily.
I used some very old paper (from Recollections!) and other bits I've been saving. I love that I can use up lots of these little pieces - I'm trying not to buy anything new for this book!


Day 6 

The background of this page is from a gift bag. The stripes are from the gusseted edges. I cut out the truck at the top from a gift tag and used washi tape at the bottom. (Not much happened this day so I just wrote on the margin about how popular the red truck is this season. I love it.)


Day 7

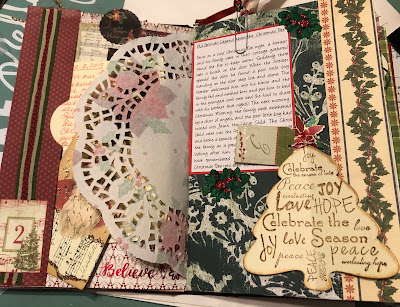
Again, I've used many OLD bits and pieces. The tree is an extra from a class I taught years ago; the little green pocket is left over from when I made the grand boys their advent calendar boxes a few years ago; the Christmas embellishment is really old! I did buy a pack of the poinsettia doilies this year from Dollar Tree. It makes a nice "tip in."


Day 8

Again I used some old scrapbook paper for the background and the banner. The piece didn't quite fit, so I made a ruffle from tissue paper for a border. The little pocket came in a card from a friend which held an ATCoin for a swap. It's perfect for a tag I made from scraps and used to journal on the back.
On the right is a folded page making a tuck spot for a journal card I made (I will do a future post about those).


Day 9

At the left you can see the back of the folded page. I used a border that came off a card I received and some gold washi tape. 

 Page 9 has a scalloped-edge border pocket with another handmade journal card tucked in. The little bird embellishment is a gift tag attached with a paper clip.


Day 10

This page has a bottom pocket as well as a "belly band" of a burlap ribbon. This day we met up with friends for a holiday dinner and I used a blank Christmas card for journaling, tucked into the pocket.
There's a clear tip-in "shaker" between this page and the next. I used a piece of page protector, sewed around the edges and filled with some Christmas confetti and sequins.


Day 11

I received photos from my daughters of the grand boys' letters to Santa, so I copied them and attached them inside this little striped file folder. It's held shut with a little Christmas owl clothespin. When I took this picture, I hadn't received the photos of Drew without his teeth, so I added that inside the folder later.


For those of you who think you lead a boring life and wouldn't have anything to journal about, think again. The joy is in the making of the journal as well as documenting even everyday things.  It can be as simple as "I went to the PO" or "had a haircut." Years from now it will be fun to look through these!

I'm leaving tomorrow for a weekend with a few art friends. One friend is hosting a "craft tea" on Saturday and several of us are spending a few days with her working on art projects. 

Friday, December 6, 2019

December Daily - let's begin

After a busy Thanksgiving weekend of travel and spending time with lots of family, I have been working on creating the foundation pages for my annual December Daily journal. 

I decided to switch it up a bit this year and change from a traveler's notebook style to a gutted hardcover book. I found a red book with a black spine at the dollar store to use.  I gathered different pieces of Christmas scrapbook paper and white mixed-media paper, folded them and sewed three signatures into the book spine using an easy three-hole pamphlet stitch. Here's the cover - I plan on keeping the red and black and will lightly decorate it when I'm finished so it won't get ruined.


This is the inside front cover. I  used scrapbook paper, acrylic words I bought last year at Tuesday Morning and some alpha stickers.

On the right is the first page. I used very old scrapbook paper for the background, a red doily and a tag pocket that I think I received in a swap a few years ago.


I made a slanted pocket on the left page using scrapbook papers (I'm trying to use up lots of old stash). I added a few handmade tags to the pocket, one listing my goals for December.

The right page is for the first day of December. I used a journaling card attached on the left with a washi tape hinge to document our Thanksgiving weekend, even though that was at the end of Nov.


These are the two tags I made for the pocket. The one on the left is an old receipt with washi tape across the top with a fabric flower and part of a napkin collaged on the bottom. The goals tag is cut from a piece of scrapbook paper that already had the lines and the design. I used alpha stickers for the title.


For Day 2 I made a side pocket on the left with two tags and a postcard I used for journaling. Between the pages is a poinsettia napkin.


On Day 3 not much was going on so I typed out an old German legend about the Christmas tree.  The tree embellishment at the bottom is 3D and was from a swap awhile ago. (I love being able to use old bits and pieces in this journal!) The number is on a little tag that dangles from the flower at the top of the tree.


Here's Day 4. It was my son-in-law's birthday so I used a journal card flip and underneath added photos of his little family celebration.  The horizontal strip is actually printed twill ribbon I found last year.


I'll be back with more in a few days!


Wednesday, November 27, 2019

November swaps

The theme for the November altered trading coins swap was "Christmas." I made these two coins to send off.


And I received these.


I also hosted an "Old is New Again Technique Tag" swap. The theme for this was to use a Tim Holtz Christmas Tag from any year as inspiration.  Mine was inspired by his tag #3 from 2007. I haven't received one back yet.


I hope everyone has a wonderful Thanksgiving weekend with family and/or friends. We are traveling to Kansas City to be with my sister-ini-law and her husband. Two of our daughters, their husbands, and the four grand boys will be there too.


May your turkey be tender, juicy and delicious! (My husband smoked a turkey last weekend for our own early holiday meal.)

Saturday, November 23, 2019

More retreat projects

This project was created on a large 12"x16" canvas board using Dyan Reaveley stamps for the outfits and borders, a brick stencil and paint for the background, and copies of photos of each of our heads. I used colored pencils and Zig markers for the coloring. This was fun and a great memento of our week.


We used two different-sized embroidery hoops to create this wall hanging in pinks and greens. The hoops were painted and covered with painted lace and canvas, then embellished with lots of flowers. This photo doesn't show the real-life colors and dimension of this pretty project.


And here is one other book we made. This is a Traveler's Notebook made with the Eileen Hull TN die from Sizzix.  The cover was cut from Spellbinder's chipboard and is very sturdy. The papers used are from Stamperia - gorgeous and vintage.  There are many pockets and tags on the three folders making up the signatures of the book. I love this size of book.

cover

Inside front cover and cover of first folder

Inside front cover of first folder (this folder has dotted-grid paper for journaling)

Inside back cover of first folder

Cover of second folder

Inside of second pocket folder

Back of pocket folder and front cover of third folder

Inside front cover of third folder (this folder contains plain paper for journaling)

Back cover of third folder and inside back cover of notebook

This notebook will be fun to fill with notes or sketches and the folders can be removed or replaced.